Understanding Galaxy history system
| Author(s) |
|
| Editor(s) |
|
| Reviewers |
|
OverviewQuestions:
Objectives:
How do Galaxy histories work?
Requirements:
Gain understanding on navigating and manipulating histories
Time estimation: 30 minutesLevel: Introductory IntroductorySupporting Materials:Published: Feb 20, 2017Last modification: Jul 23, 2026License: Tutorial Content is licensed under Creative Commons Attribution 4.0 International License. The GTN Framework is licensed under MITpurl PURL: https://gxy.io/GTN:T00150rating Rating: 4.8 (5 recent ratings, 83 all time)version Revision: 13
Warning: Compatible Versions of GalaxyThis tutorial has been tested to work with 24.1
- Galaxy’s Interface may be different to the Galaxy where you are following this tutorial.
- ✅ All tutorial steps will still be able to be followed (potentially with minor differences for moved buttons or changed icons.)
- ✅ Tools will all still work
When data is uploaded from your computer or analysis is done on existing data using Galaxy, each output from those steps generates a dataset. These datasets (and the output datasets from later analysis on them) are stored by Galaxy in Histories.
The history panel
All users have one ‘current’ history, which can be thought of as a workspace or a current working directory in bioinformatics terms. Your current history is displayed on the right-hand side of the main ‘Analyze Data’ Galaxy page in what is called the history panel.
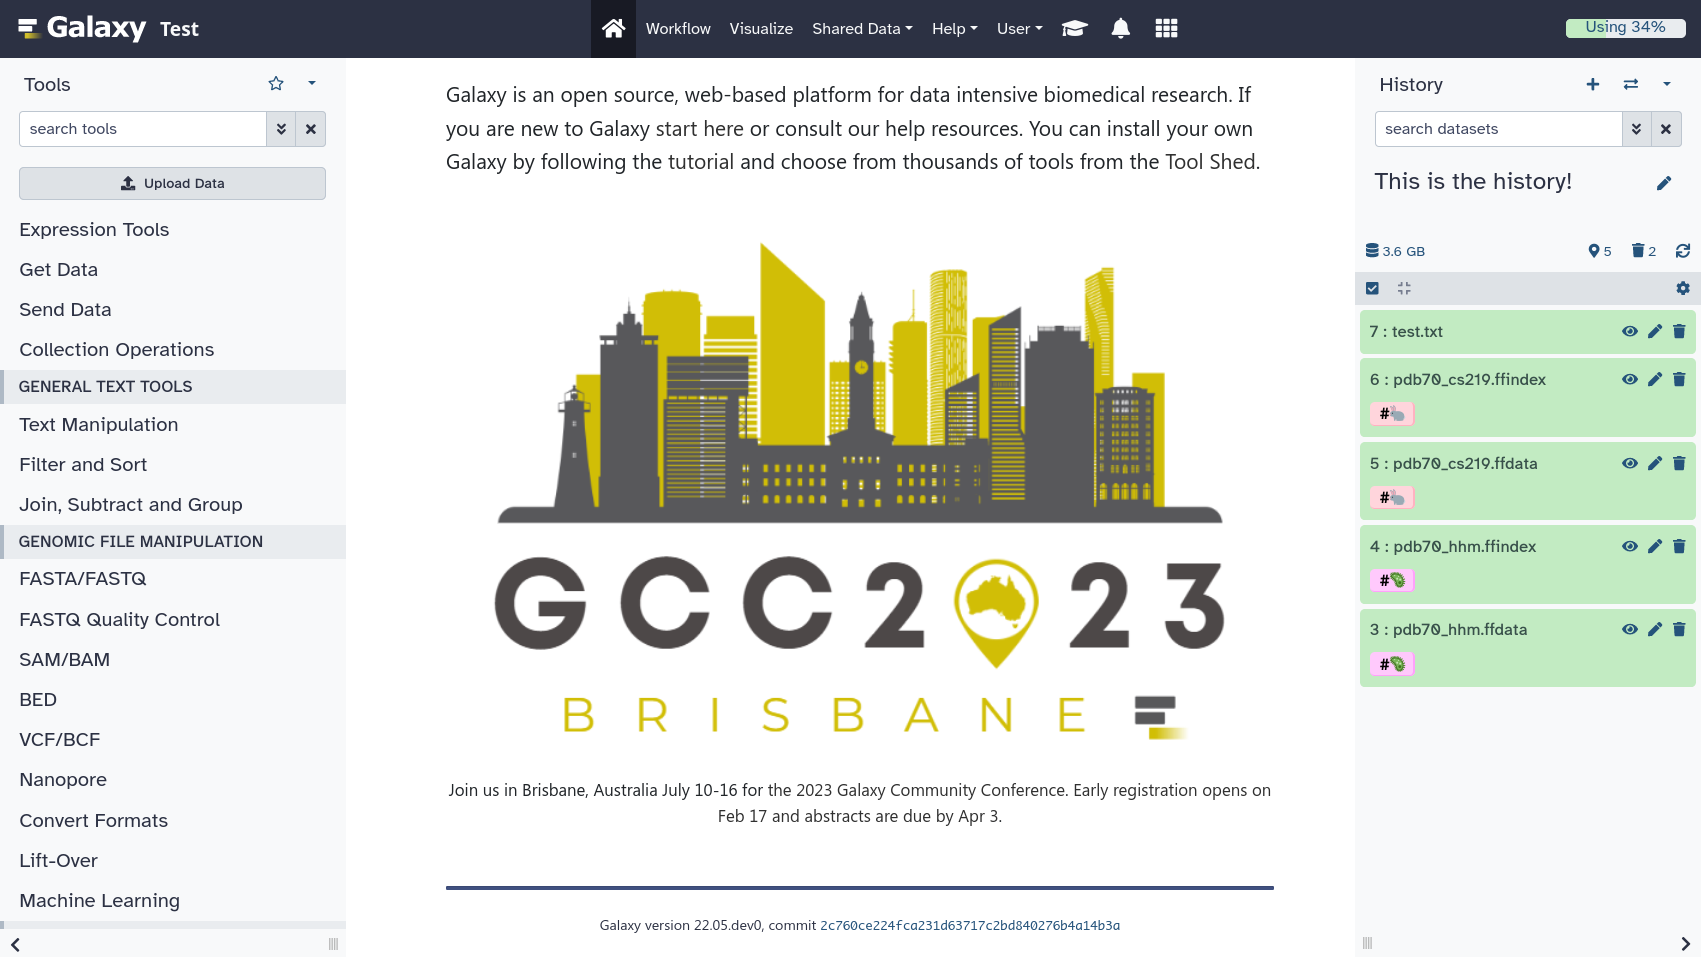 Open image in new tab
The history panel displays output datasets in the order in which they were created, with the oldest/first shown at the bottom. As new analyses are done and new output datasets are generated, the newest datasets are added to the top of the history panel. In this way, the history panel displays the history of your analysis over time.
Users that have registered an account and logged in can have many histories and the history panel allows switching between them and creating new ones. This can be useful to organize different analyses.
Anonymous users (if your Galaxy instance allows them) are users that have not registered an account. Anonymous users are only allowed one history. Users are encouraged to register and log in with the benefit that they can work on many histories and switch between them.
Warning: Anonymous Users: BewareThe histories of anonymous users are only associated through your browser’s session. If you close the browser or clear you sessions - that history will be lost! We can not recover it for you if it is.
Global history controls
Above the current history panel are three buttons:
- The new-history “Create new history” button will create an empty history.
- The switch-histories “Switch to history” will open a window letting you easily swap to any of your other histories.
- The galaxy-history-options “History options” (formerly the galaxy-gear “Gear menu”) gives you access to advanced options to work with your history.

new-history “Create new history”
To create a new history simply click the new-history icon at the top of the history panel:

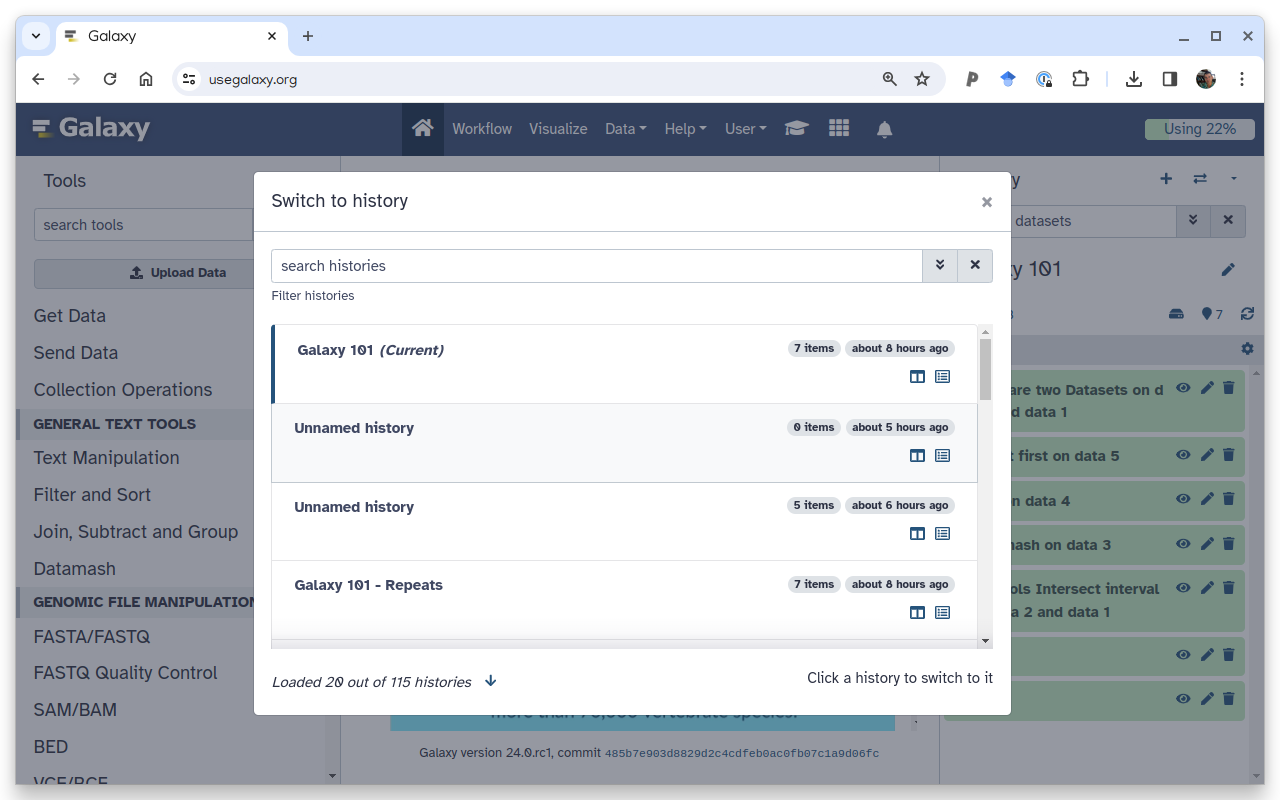
switch-histories “Switch to history”
To switch to an existing history simply click the switch-histories icon at the top of the history panel. This opens a list of histories existing in a given Galaxy account in the middle part of the interface.
galaxy-history-options “History options”
Clicking the galaxy-history-options button will open a drop-down menu with several options:
- Show histories side-by-side - brings up a view in which multiple histories can be viewed and manipulated simultaneously. Datasets can be dragged between histories in this view.
- Resume Paused Jobs - restarts paused jobs in history.
- Copy this history - creates an exact copy of the current history in the current account.
- Delete this history - deletes the current history.
- Export tool citations - export citations for tools that were used in the current history.
- Export history to File - creates a compressed archive containing data from the current history.
- Archive history - moves history to a non-active, archived, state.
- Extract workflow - converts the current history into a workflow
- Show invocations - shows a list of all workflows that were run in the current history
- Share or Publish - allows controlling access to history. It can be made public or shared with a specific user.
- Set Permissions - allows to set the rules on who can access daysets in the current history.
- Make Private - resets all permission and makes the current history private.
History manipulation
Renaming a history
All histories begin with the name ‘Unnamed history’. Non-anonymous users can rename the history as they see fit:
- Click on galaxy-pencil (Edit) next to the history name (which by default is “Unnamed history”)
- Type the new name
- Click on Save
- To cancel renaming, click the galaxy-undo “Cancel” button
If you do not have the galaxy-pencil (Edit) next to the history name (which can be the case if you are using an older version of Galaxy) do the following:
- Click on Unnamed history (or the current name of the history) (Click to rename history) at the top of your history panel
- Type the new name
- Press Enter
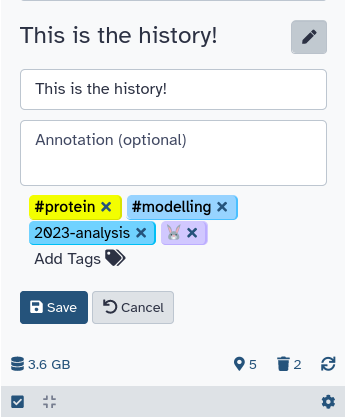
Tagging a history
Tags are short pieces of text used to describe the thing they’re attached to and many things in Galaxy can be tagged. Each item can have many tags and you can add new tags or remove them at any time. Tags can be another useful way to organize and search your data. For instance, you might tag a history with the type of analysis you did in it: assembly or variants. Or you may tag them according to data sources or some other metadata: long-term-care-facility or yellowstone-park:2014.
To tag a history:
- Click on galaxy-pencil (Edit) next to the history name (which by default is “Unnamed history”).
- Click on Add tags galaxy-tags and start typing. Any tags that you’ve used previously will show below your partial entry - allowing you to use this ‘autocomplete’ data to re-use your previous tags without typing them in full.
- Click on Save galaxy-save.
- To cancel, click the galaxy-undo “Cancel” button.
Warning: Do not use spacesIt is strongly recommended to replace spaces in tags with
_or-, as spaces will automatically be removed when the tag is saved.
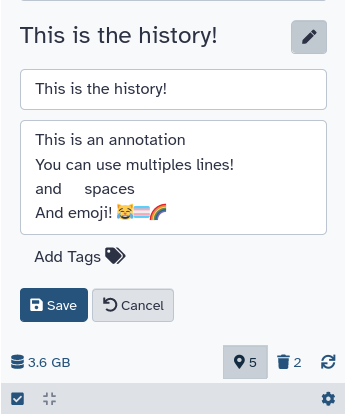
Annotating a history
Sometimes tags and names are not enough to describe the work done within a history. Galaxy allows you to create history annotations: longer text entries that allow for more formatting options. The formatting of the text is preserved. Later, if you publish or share the history, the annotation will be displayed automatically - allowing you to share additional notes about the analysis. Multiple lines, spaces, and emoji! 😹🏳️⚧️🌈 can be used while writing annotations.
To annotate a history:
- Click on galaxy-pencil (Edit) next to the history name. A larger text section will appear displaying any existing annotation or
Annotation (optional)if empty. - Add your text. Enter will move the cursor to the next line. (Tabs cannot be entered since the ‘Tab’ button is used to switch between controls on the page - tabs can be pasted in, however).
- Click on Save galaxy-save.
- To cancel, click the galaxy-undo “Cancel” button.
Undeleting … deleted histories
Deleted histories can be undeleted:
- Select “Histories” from the activity bar on the left
- Toggle “Advanced search”
- Click “Deleted”
- Click on the title of the history you want to un-delete and un-delete it!
History size, storage selection, and views
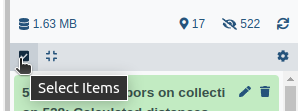
The lower part of the history header contains a number of buttons:
 Open image in new tab
Warning: Some buttons are instance-specificThe list of buttons shown above may vary depending on which Galaxy instance you are using. For example, at the time of writing, the Preferred storage galaxy-history-storage-choice button is not available on all Galaxy instances.
- galaxy-history-size History size - shows history storage overview in the central pane of the interface.
- galaxy-history-storage-choice Preferred storage location - allows users to specify where history datasets will be stored. It is an optional feature when you have multiple storage locations available. The button might therefore not be visible on all Galaxy instances.
- galaxy-show-active Show active - shows active (non-deleted and non-hidden) datasets in the history.
- galaxy-delete Include deleted - includes deleted datasets into the history view. If you delete a dataset, it does not disappear unless you explicitly purge it.
- galaxy-show-hidden Include hidden - include hidden datasets into the history view. Any dataset in history can be hidden. For example, workflow executions frequently hide intermediate datasets so that they do not complicate the history view. It is a way to hide non-important datasets from view.
History datasets
So far, we have only discussed functions and controls affecting the entire history. Yet history is a collection of datasets. Now it is time to discuss the interface elements of individual datasets.
Datasets can be individual or bundled into collections
A history dataset can exist by itself, as an independent entity, or as a part of a collection. Collections make it possible to analyze datasets with hundreds of thousands of samples.
Datasets versus collections
In Galaxy’s history datasets can be present as individual entries or they can be combined into Collections. Why do we need collections? Collections combine multiple individual datasets into a single entity which is easy to manage. Galaxy tools can use collections directly as inputs. Collection can be simple or nested.
Simple collections
Imagine that you’ve uploaded a hundred FASTQ files corresponding to a hundred samples. These will appear as a hundred individual datasets in your history making it very long. But the chances are that when you analyze these data you will do the same thing on each dataset.
To simplify this process you can combine all hundred datasets into a single entity called a dataset collection (or simply a collection or a list). It will appear as a single box in your history making it much easier to understand. Galaxy tools are designed to take collections as inputs. So, for example, if you want to map each of these datasets against a reference genome using, say, Minimap2 , you will need to provide minmap2 with just one input, the collection, and it will automatically start 100 jobs behind the scenes and will combine all outputs into a single collection containing BAM files.

There is a number of situations when simple collections are not sufficient to reflect the complexity of the data. To deal with this situation Galaxy allows for nested collections.
Nested collections
Probably the most common example of this is paired end data when each sample is represented by two files: one containing forward reads and another containing reverse reads. In Galaxy you can create nested collection that reflects the hierarchy of the data. In the case of paired data Galaxy supports paired collections.

Creating a dataset collection
- Click on galaxy-selector Select Items at the top of the history panel
- Check all the datasets in your history you would like to include
-
Click n of N selected and choose Advanced Build List
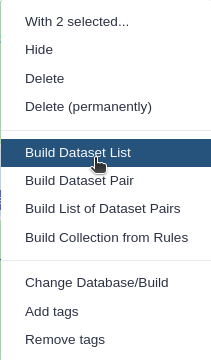
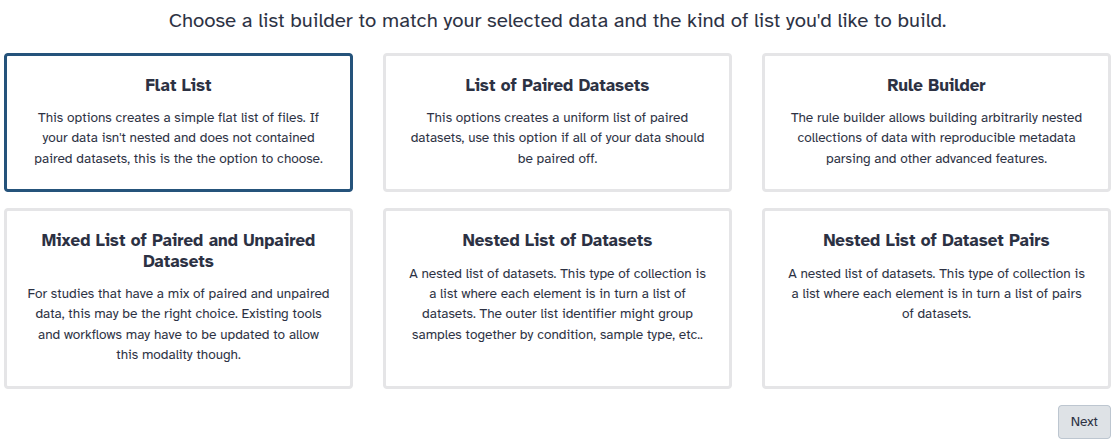
-
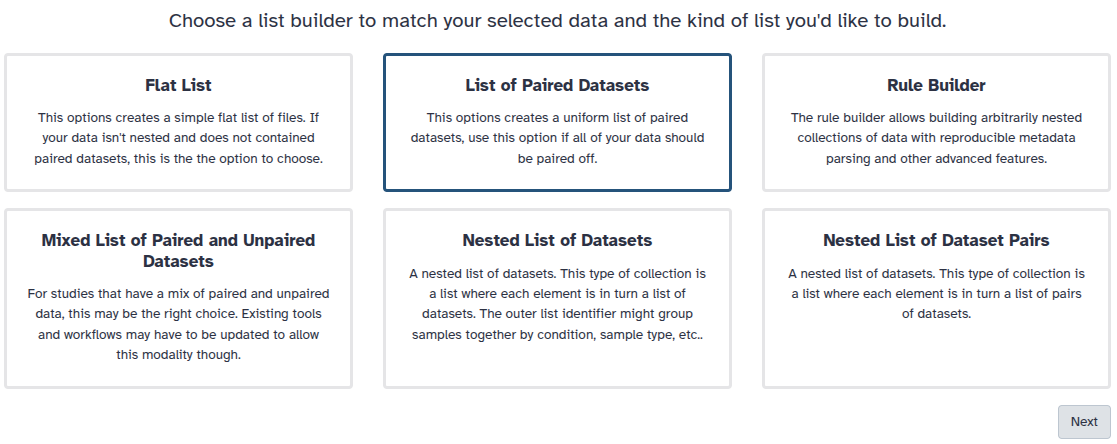
You are in collection building wizard. Choose Flat List and click ‘Next’ button at the right bottom corner.
-
Double clcik on the file names to edit. For example, remove file extensions or common prefix/suffixes to cleanup the names.
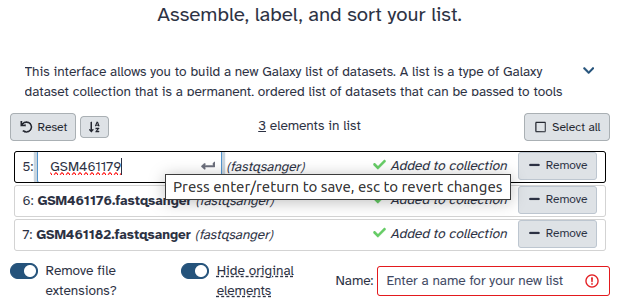
- Enter a name for your collection
- Click Build to build your collection
- Click on the checkmark icon at the top of your history again
Creating a paired collection
- Click on galaxy-selector Select Items at the top of the history panel
- Check all the datasets in your history you would like to include
-
Click n of N selected and choose Advanced Build List
-
You are in the collection building wizard. Choose List of Paired Datasets and click ‘Next’ button at the right bottom corner.
-
Check and configure auto-pairing. Commonly matepairs have suffix
_1and_2or_R1and_R2. Click on ‘Next’ at the bottom.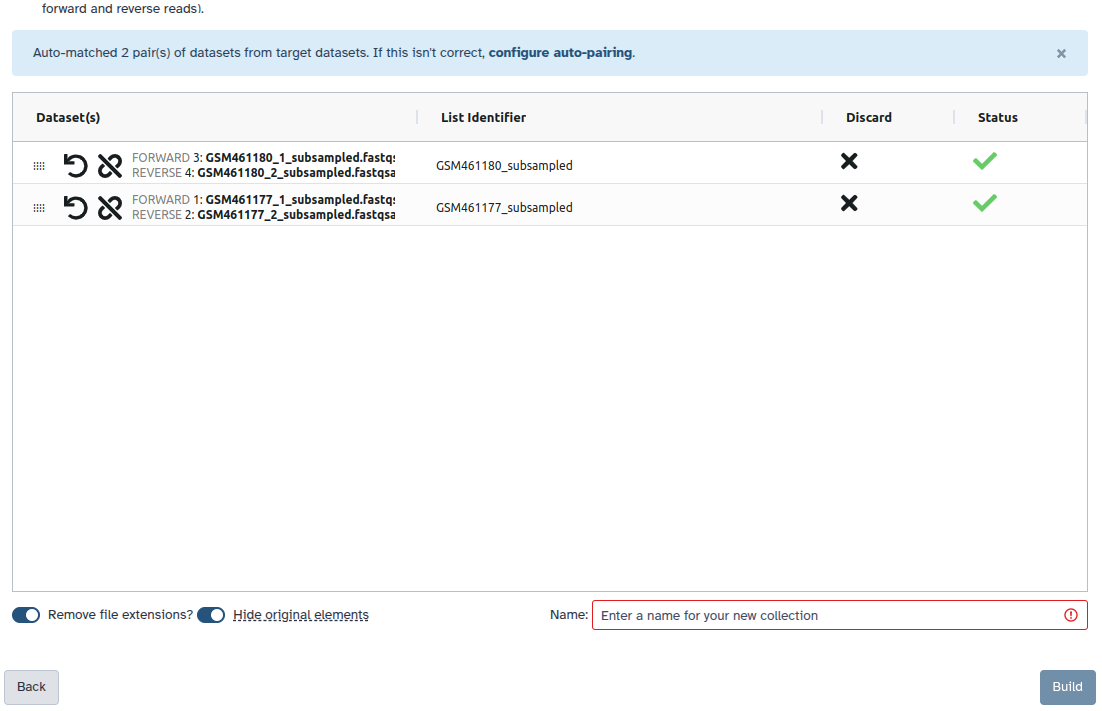
- Edit the List Identifier as required.
- Enter a name for your collection
- Click Build to build your collection
- Click on the checkmark icon at the top of your history again
United Colors of Galaxy: Dataset states
There are several different “states” a dataset can be in. These states are indicated by colors:

- ok: everything is fine, life is good;
- new: the dataset was just created. Galaxy does not yet know when it is available;
- queued: indicates that the job generating this dataset is scheduled for execution but not running yet;
- running: job generating this dataset is running;
- setting metadata: when a new dataset is uploaded Galaxy examines it to understand what kind of data it is (e.g., BAM, FASTQ, fasta, BED, etc.). This is called “setting metadata”;
- deferred: sometimes it does not make sense to upload the dataset until it is needed for an analysis. Galaxy will download deferred datasets later during the job execution. Those datasets do not count toward your quota;
- paused: in some cases, workflow executions or upstream errors can prevent subsequent jobs from starting to create datasets in “paused” state. Rerun the errored tool with the option Resume dependencies from this job? to resume paused jobs;
- discarded: something went wrong. For example, a job producing this dataset might have been cancelled;
- error: everything is not fine; life is bad! Click on the information i button to know more about what happened;
- placeholder: similar to “new”; we know something will be there, but are not yet sure what;
- failed populated state: this refers to collections (not individual datasets). Here, a collection has failed to be populated with datasets;
- new populated state: this refers to collections (not individual datasets). A collection was created but not populated yet.
Dataset snippet in detail
A single Galaxy dataset can either be “collapsed” or “expanded”.
Collapsed dataset view
Datasets in the panel are initially shown in a “collapsed” view:

It contains the following elements:
- Dataset number: (“1”) order of dataset in the history;
- Dataset name: (“M117-bl_1.fq.gz”) its name;
- galaxy-eye: click this to view the dataset contents;
- galaxy-pencil: click this to edit dataset properties;
- galaxy-delete: click this to delete the dataset from the history (don’t worry, you can undo this action!).
Clicking on a collapsed dataset will expand it.
Some of the buttons above may be disabled if the dataset is in a state that doesn’t allow the action. For example, the ‘edit’ button is disabled for datasets that are still queued or running
Expanded dataset view
Expanded dataset view adds a preview element and many additional controls.

In addition to the elements described above for the collapsed dataset, its expanded view contains:
- Add tags galaxy-tags: click on this to tag this dateset;
- Dataset size: (“2 lines, 18 comments”) lists the size of the dataset. When datasets are small (like in this example) the exact size is shown. For large datasets, Galaxy gives an approximate estimate.
- format: (“VCF”) lists the datatype;
- database: (“?”) lists which genome built this dataset corresponds to. This usually lists “?” unless the genome build is set explicitly or the dataset is derived from another dataset with defined genome build information;
- info field: (“INFO [2024-03-26 12:08:53,435]…”) displays information provided by the tool that generated this dataset. This varies widely and depends on the type of job that generated this dataset.
- dataset-save: Saves dataset to disk;
- dataset-link: Copies dataset link into clipboard;
- dataset-info: Displays additional details about the dataset in the center pane;
- dataset-rerun: Reruns job that generated this dataset. This button is unavailable for datasets uploaded into history because they were not produced by a Galaxy tool;
- dataset-visualize: Displays visualization options for this dataset. The list of options is dependent on the datatype;
- dataset-related-datasets: Shows datasets related to this dataset. This is useful for tracking down parental datasets - those that were used as inputs into a job that produced this particular dataset.
Managing Datasets Individually
Hiding and unhiding datasets
Datasets in a Galaxy history can be hidden. This is useful for reducing the complexity of a history. For example, some intermediate datasets generated during an analysis or workflow execution are not important, and there is no need to see them.
Hiding datasets
To hide datasets:
- Click history-select-multiple icon at the top of the history pane;
- Select datasets you want to hide;
- Click the dropdown that would appear at the top of the history;
- Select “Hide” option.
Unhiding datasets
If your history contains hidden datasets you will see galaxy-show-hidden “Include hidden” button directly above the dataset display.
To un-hide datasets:
- Type
visible:hiddenin the search box - Select datasets you want to un-hide
- Click the dropdown that would appear at the top of the history;
- Select “Unhide” option.
Alternatively, you can:
- click galaxy-show-hidden “Include hidden” button directly above dataset display. This will cause hidden datasets to appear in history along with normal (un-hidden) datasets;
- hidden datasets are distinguished by having galaxy-show-hidden within dataset box. Clicking on this icon will un-hide a given dataset;
Deleting and undeleting datasets
You can delete any dataset in your history. Unless you explicitly tell Galaxy to delete a dataset permanently (see below), this does not immediately remove the dataset from Galaxy it is reversible. When you delete a dataset from the history, it will be removed from the pane (just like hidden datasets).
Deleting datasets
Deleting datasets individually
To delete datasets individually simply click the galaxy-delete button with dataset’s box. That’s it! This action is reversible: datasets can be undeleted.
Deleting datasets in bulk
To delete multiple datasets at once:
- Click history-select-multiple icon at the top of the history pane;
- Select datasets you want to delete;
- Click the dropdown that would appear at the top of the history;
- Select “Delete” option.
This action is also reversible: datasets can be undeleted.
Deleting datasets permanently warning Danger zone!
Warning: Permanent is ... PERMANENT!Datasets deleted in this fashion CANNOT be undeleted!
To delete multiple datasets PERMANENTLY:
- Click history-select-multiple icon at the top of the history pane;
- Select datasets you want to delete;
- Click the dropdown that would appear at the top of the history;
- Select “Delete (permanently)” option.
Undeleting datasets
If your history contains deleted datasets you will see galaxy-delete “Include deleted” button directly above dataset display.
To un-delete datasets:
- Type
deleted:truein the search box - Select datasets you want to un-delete
- Click the dropdown that would appear at the top of the history;
- Select “Undelete” option.
Alternatively, you can:
- click galaxy-delete “Include deleted” button directly above dataset display. This will cause deleted datasets to appear in history along with normal (un-deleted) datasets;
- deleted datasets are distinguished by having dataset-undelete within dataset box. Clicking on this icon will un-delete a given dataset;
Comment: Admins may purge your deleted datasetsDepending on the policy of your Galaxy server, administrators may run scripts that search for and purge the datasets you’ve marked as deleted. Often, deleted datasets and histories are purged based on the age of the deletion (e.g. datasets that have been marked as deleted for 90 days or more). Check with the administrators of your Galaxy instance to find out the policy used.
Tagging datasets
Datasets can be tagged. This simplifies the tracking of datasets across the Galaxy interface. Tags can contain any combination of letters or numbers but cannot contain spaces.
To tag a dataset:
- Click on the dataset to expand it
- Click on Add Tags galaxy-tags
- Add tag text. Tags starting with
#will be automatically propagated to the outputs of tools using this dataset (see below). - Press Enter
- Check that the tag appears below the dataset name
Tags beginning with # are special!
They are called Name tags. The unique feature of these tags is that they propagate: if a dataset is labelled with a name tag, all derivatives (children) of this dataset will automatically inherit this tag (see below). The figure below explains why this is so useful. Consider the following analysis (numbers in parenthesis correspond to dataset numbers in the figure below):
- a set of forward and reverse reads (datasets 1 and 2) is mapped against a reference using Bowtie2 generating dataset 3;
- dataset 3 is used to calculate read coverage using BedTools Genome Coverage separately for
+and-strands. This generates two datasets (4 and 5 for plus and minus, respectively); - datasets 4 and 5 are used as inputs to Macs2 broadCall datasets generating datasets 6 and 8;
- datasets 6 and 8 are intersected with coordinates of genes (dataset 9) using BedTools Intersect generating datasets 10 and 11.

Now consider that this analysis is done without name tags. This is shown on the left side of the figure. It is hard to trace which datasets contain “plus” data versus “minus” data. For example, does dataset 10 contain “plus” data or “minus” data? Probably “minus” but are you sure? In the case of a small history like the one shown here, it is possible to trace this manually but as the size of a history grows it will become very challenging.
The right side of the figure shows exactly the same analysis, but using name tags. When the analysis was conducted datasets 4 and 5 were tagged with #plus and #minus, respectively. When they were used as inputs to Macs2 resulting datasets 6 and 8 automatically inherited them and so on… As a result it is straightforward to trace both branches (plus and minus) of this analysis.
More information is in a dedicated #nametag tutorial.
Managing Multiple Datasets Easily
You can also hide, delete, and purge multiple datasets at once by multi-selecting datasets:
- galaxy-selector Click the multi-select button containing the checkbox just below the history size.
- Checkboxes will appear inside each dataset in the history.
- Scroll and click the checkboxes next to the datasets you want to manage.
- Click the ‘n of N selected’ to choose the action. The action will be performed on all selected datasets, except for the ones that don’t support the action. That is, if an action doesn’t apply to a selected dataset, like deleting a deleted dataset, nothing will happen to that dataset, while all other selected datasets will be deleted.
- You can click the multi-select button again to hide the checkboxes.
Basic Searching
You can filter what datasets are shown and search for datasets using the search bar at the top of the panel. Enter any text that a dataset you’d be looking for would contain, including:
- the name or part of the name
- any text (or partial text) from the info field
- the file format or reference database
- any text or partial text from the annotation or tags of a dataset
For example:
- To find all vcf files you might enter:
vcfalone. - To find all files whose names contain data 1, you can enter:
data 1 - To search for a VCF file named ‘VCF filter on data 1’ and tagged with ‘experiment_1’, you could enter:
vcf filter on data 1 experiment_1
Clearing a Search
You can clear a search and show all visible datasets by clicking the ‘X’ button in the right end of the search bar or - while entering text in the search bar - hitting the escape key (‘Esc’).
Advanced Searching
You can also specify dataset properties that you want to filter on. If you search with multiple properties, these are connected with ANDs, so datasets must match all provided attributes. Here are some examples of filters you can use:
| Query | Results |
|---|---|
name:'FASTQC on' |
Any datasets with “FASTQC on” in the title, but avoids items which have “FASTQC on” in other fields like the description or annotation. |
extension:vcf |
Datasets with a specific format. Some formats are hierarchical, e.g. searching for fastq will find fastq files but also fastqsanger and fastqillumina files. You can see more formats in the upload dialogue. |
tag:experiment1 tag:to_publish |
for searching on (a partial) dataset tag. You can repeat to search for more tags. |
hid:4 |
The specific item with history item ID 4 (based on the ordering in the history) (This is also a ranged filter, so hid>4 will return all history items with ID greater than 4) |
related:10 |
Datasets “related to” (inputs/outputs for) a dataset with specific history item ID (based on the ordering in the history) |
state:error |
To show only datasets in a given state. Other options include ok, running, paused, new, etc. (Click on the dropdown to see all options) |
If you find normal searching is showing too many datasets, and not what you’re looking for, try the advanced search! Just use the galaxy-advanced-search button next to the search field to show the advanced selector.
You've Finished the Tutorial
Key points
In Galaxy, data is stored in datasets and organized in histories
The right pane shows the current history. It displays the name of the history, the tags and annotations assigned to it, and the size of the data in it
The datasets are shown differently depending on their status: queued, running, ok, error, or paused
The summary view for each dataset can be expanded to show additional information
Datasets deleted are hidden from history. They can be restored to the history, or permanently deleted from the server, or purged. Purged files cannot be restored
Histories can also be deleted and purged, similar to datasets
Datasets can be organized into collections within a history with search and multi-select. Jobs applied to collections use the same settings for each dataset in the collection
Frequently Asked Questions
Have questions about this tutorial? Have a look at the available FAQ pages and support channelsFeedback
Did you use this material as an instructor? Feel free to give us feedback on how it went.
Did you use this material as a learner or student? Click the form below to leave feedback.

Citing this Tutorial
- Anton Nekrutenko, Understanding Galaxy history system (Galaxy Training Materials). https://training.galaxyproject.org/training-material/topics/galaxy-interface/tutorials/history/tutorial.html Online; accessed TODAY
- Hiltemann, Saskia, Rasche, Helena et al., 2023 Galaxy Training: A Powerful Framework for Teaching! PLOS Computational Biology 10.1371/journal.pcbi.1010752
- Batut et al., 2018 Community-Driven Data Analysis Training for Biology Cell Systems 10.1016/j.cels.2018.05.012
@misc{galaxy-interface-history,
author = "Anton Nekrutenko",
	title = "Understanding Galaxy history system (Galaxy Training Materials)",
	year = "",
	month = "",
	day = "",
	url = "\url{https://training.galaxyproject.org/training-material/topics/galaxy-interface/tutorials/history/tutorial.html}",
	note = "[Online; accessed TODAY]"
}
@article{Hiltemann_2023,
	doi = {10.1371/journal.pcbi.1010752},
	url = {https://doi.org/10.1371%2Fjournal.pcbi.1010752},
	year = 2023,
	month = {jan},
	publisher = {Public Library of Science ({PLoS})},
	volume = {19},
	number = {1},
	pages = {e1010752},
	author = {Saskia Hiltemann and Helena Rasche and Simon Gladman and Hans-Rudolf Hotz and Delphine Larivi{\`{e}}re and Daniel Blankenberg and Pratik D. Jagtap and Thomas Wollmann and Anthony Bretaudeau and Nadia Gou{\'{e}} and Timothy J. Griffin and Coline Royaux and Yvan Le Bras and Subina Mehta and Anna Syme and Frederik Coppens and Bert Droesbeke and Nicola Soranzo and Wendi Bacon and Fotis Psomopoulos and Crist{\'{o}}bal Gallardo-Alba and John Davis and Melanie Christine Föll and Matthias Fahrner and Maria A. Doyle and Beatriz Serrano-Solano and Anne Claire Fouilloux and Peter van Heusden and Wolfgang Maier and Dave Clements and Florian Heyl and Björn Grüning and B{\'{e}}r{\'{e}}nice Batut and},
	editor = {Francis Ouellette},
	title = {Galaxy Training: A powerful framework for teaching!},
	journal = {PLoS Comput Biol}
}
Funding
These individuals or organisations provided funding support for the development of this resource
Congratulations on successfully completing this tutorial!