Training Infrastructure as a Service (TIaaS)
| Author(s) |
|
| Reviewers |
|
OverviewQuestions:
Objectives:
How to deploy EU’s TIaaS
Requirements:
Setup TIaaS
Request and manage trainings
Join a training
- slides Slides: Ansible
- tutorial Hands-on: Ansible
- slides Slides: Galaxy Installation with Ansible
- tutorial Hands-on: Galaxy Installation with Ansible
- slides Slides: Connecting Galaxy to a compute cluster
- tutorial Hands-on: Connecting Galaxy to a compute cluster
- tutorial Hands-on: Mapping Jobs to Destinations using TPV
- slides Slides: Running Jobs on Remote Resources with Pulsar
- tutorial Hands-on: Running Jobs on Remote Resources with Pulsar
Time estimation: 30 minutesSupporting Materials:Published: Feb 12, 2020Last modification: Nov 24, 2025License: Tutorial Content is licensed under Creative Commons Attribution 4.0 International License. The GTN Framework is licensed under MITpurl PURL: https://gxy.io/GTN:T00022rating Rating: 5.0 (0 recent ratings, 1 all time)version Revision: 45
Galaxy is widely used for teaching. In order to facilitate instructors, the Galaxy Project has developed Training Infrastructure as a Service (TIaaS). Workshop instructors can apply for TIaaS, and on the day of their workshop, their participants will be placed in a special group and use dedicated resources, thus reducing queue times on the day of the training.
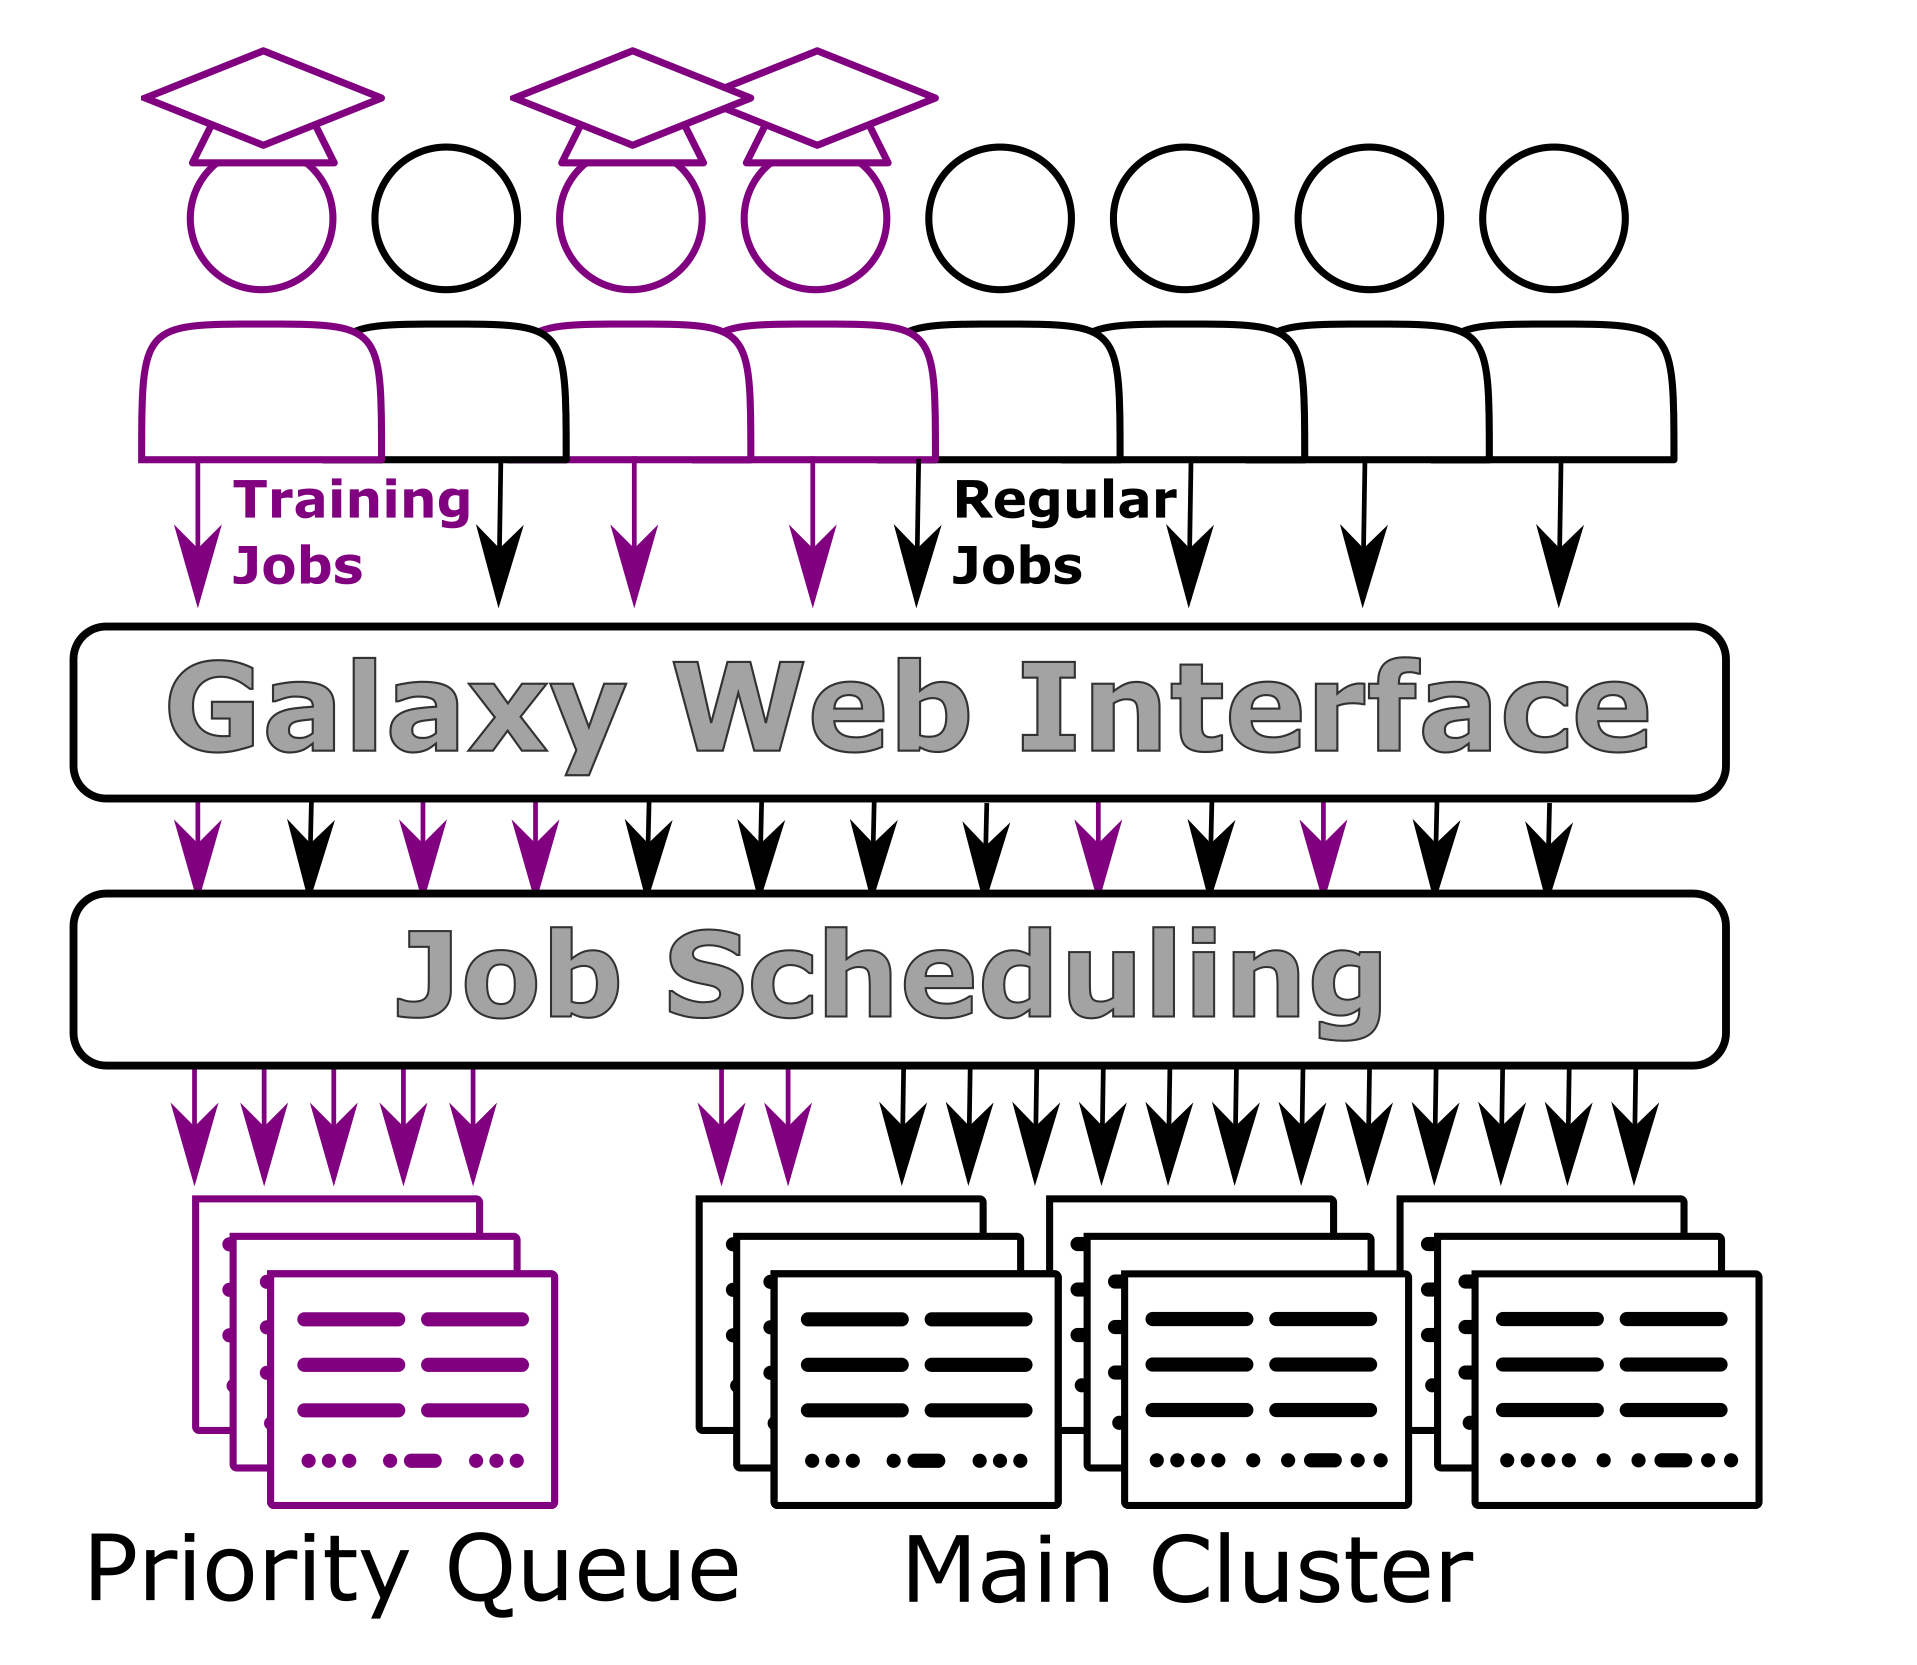 Open image in new tab
This tutorial will go cover how to set up such a service on your own Galaxy server.
Agenda
Comment: Galaxy Admin Training PathThe yearly Galaxy Admin Training follows a specific ordering of tutorials. Use this timeline to help keep track of where you are in Galaxy Admin Training.
Setting up TIaaS
Hands On: Setup TIaaS
In your
requirements.ymladd the TIaaS ansible role:--- a/requirements.yml +++ b/requirements.yml @@ -50,3 +50,6 @@ version: 6f6fdf7f5ead491560783d52528b79e9e088bd5b - src: cloudalchemy.grafana version: 0.14.2 +# Training Infrastructure as a Service +- src: galaxyproject.tiaas2 + version: 2.1.5And run the install step:
Code In: Bashansible-galaxy install -p roles -r requirements.ymlIf you haven’t worked with diffs before, this can be something quite new or different.
If we have two files, let’s say a grocery list, in two files. We’ll call them ‘a’ and ‘b’.
Code In: Old$ cat old
🍎
🍐
🍊
🍋
🍒
🥑Code Out: New$ cat new
🍎
🍐
🍊
🍋
🍍
🥑We can see that they have some different entries. We’ve removed 🍒 because they’re awful, and replaced them with an 🍍
Diff lets us compare these files
$ diff old new
5c5
< 🍒
---
> 🍍
Here we see that 🍒 is only in a, and 🍍 is only in b. But otherwise the files are identical.
There are a couple different formats to diffs, one is the ‘unified diff’
$ diff -U2 old new
--- old	2022-02-16 14:06:19.697132568 +0100
+++ new	2022-02-16 14:06:36.340962616 +0100
@@ -3,4 +3,4 @@
 🍊
 🍋
-🍒
+🍍
 🥑
This is basically what you see in the training materials which gives you a lot of context about the changes:
--- oldis the ‘old’ file in our view+++ newis the ‘new’ file- @@ these lines tell us where the change occurs and how many lines are added or removed.
- Lines starting with a - are removed from our ‘new’ file
- Lines with a + have been added.
So when you go to apply these diffs to your files in the training:
- Ignore the header
- Remove lines starting with - from your file
- Add lines starting with + to your file
The other lines (🍊/🍋 and 🥑) above just provide “context”, they help you know where a change belongs in a file, but should not be edited when you’re making the above change. Given the above diff, you would find a line with a 🍒, and replace it with a 🍍
Added & Removed Lines
Removals are very easy to spot, we just have removed lines
--- old	2022-02-16 14:06:19.697132568 +0100
+++ new	2022-02-16 14:10:14.370722802 +0100
@@ -4,3 +4,2 @@
 🍋
 🍒
-🥑
And additions likewise are very easy, just add a new line, between the other lines in your file.
--- old	2022-02-16 14:06:19.697132568 +0100
+++ new	2022-02-16 14:11:11.422135393 +0100
@@ -1,3 +1,4 @@
 🍎
+🍍
 🍐
 🍊
Completely new files
Completely new files look a bit different, there the “old” file is
/dev/null, the empty file in a Linux machine.$ diff -U2 /dev/null old
--- /dev/null 2022-02-15 11:47:16.100000270 +0100
+++ old 2022-02-16 14:06:19.697132568 +0100
@@ -0,0 +1,6 @@
+🍎
+🍐
+🍊
+🍋
+🍒
+🥑And removed files are similar, except with the new file being /dev/null
--- old	2022-02-16 14:06:19.697132568 +0100
+++ /dev/null	2022-02-15 11:47:16.100000270 +0100
@@ -1,6 +0,0 @@
-🍎
-🍐
-🍊
-🍋
-🍒
-🥑
In your
galaxyserversgroup variables file, add the following:--- a/group_vars/galaxyservers.yml +++ b/group_vars/galaxyservers.yml @@ -350,3 +350,8 @@ telegraf_plugins_extra: - timeout = "10s" - data_format = "influx" - interval = "15s" + +# TIaaS setup +tiaas_dir: /srv/tiaas +tiaas_admin_user: admin +tiaas_admin_pass: changemeIn the
galaxyserversgroup variables file, we also need to set the database permissions correctly for TIaaS. It needs to be able to access some Galaxy tables, and we will carefully define only the ones we really need:--- a/group_vars/dbservers.yml +++ b/group_vars/dbservers.yml @@ -3,6 +3,7 @@ postgresql_objects_users: - name: "{{ galaxy_user_name }}" - name: telegraf + - name: tiaas postgresql_objects_databases: - name: "{{ galaxy_db_name }}" owner: "{{ galaxy_user_name }}" @@ -11,7 +12,26 @@ postgresql_objects_privileges: roles: telegraf privs: SELECT objs: ALL_IN_SCHEMA - + - database: galaxy + roles: tiaas + objs: galaxy_user,galaxy_session,job,history,workflow,workflow_invocation + type: table + privs: SELECT + - database: galaxy + roles: tiaas + objs: user_group_association,galaxy_group,role,group_role_association + type: table + privs: SELECT,INSERT + - database: galaxy + roles: tiaas + objs: group_role_association + type: table + privs: DELETE + - database: galaxy + roles: tiaas + objs: role_id_seq,galaxy_group_id_seq,group_role_association_id_seq,user_group_association_id_seq + type: sequence + privs: USAGE,SELECT # PostgreSQL Backups postgresql_backup_dir: /data/backupsThe
DELETEprivilege is limited in scope to one table:group_role_association. This allows TIaaS to disassociate training groups from roles in the Galaxy database after the training event date has passed, so that users who participated in a training return to using normal (non-training) resources after the training ends.The
galaxyproject.tiaas2role will create a cron job to perform this process every night at midnight. You can control when this runs (or disable it) using the tiaas_disassociate_training_roles variable.This is one of the few statements we’ve provided that presents difficulties when running the playbook completely from scratch on a blank machine. Setting postgresql roles is one of the first steps in our playbook, but the rules we’ve provided above depend on the Galaxy tables existing in that database. If those tables aren’t there, it will fail. If you do someday run this from scratch, you’ll find that you need to comment out those roles.
We need to add the
galaxyproject.tiaas2role before thenginxrole, as TIaaS defines variables that Nginx needs.--- a/galaxy.yml +++ b/galaxy.yml @@ -47,6 +47,7 @@ - galaxyproject.nginx - geerlingguy.docker - usegalaxy_eu.rabbitmqserver + - galaxyproject.tiaas2 - galaxyproject.gxadmin - galaxyproject.cvmfs - dj-wasabi.telegrafLastly we should add the routes for TIaaS to the NGINX template for Galaxy. TIaaS provides a set of default nginx routes that can be used.
--- a/templates/nginx/galaxy.j2
+++ b/templates/nginx/galaxy.j2
@@ -114,4 +114,7 @@ server {
 		proxy_pass http://127.0.0.1:3000/;
 		proxy_set_header Host $http_host;
 	}
+
+	{{ tiaas_nginx_routes }}
+
 }
Run the playbook
Code In: Bashansible-playbook galaxy.yml
1.sh
TIaaS should be available now! The following routes on your server are now configured (we will run through these in the next section)
| URL | Use | Audience |
|---|---|---|
| /tiaas/new/ | Request a new TIaaS training | Instructors |
| /tiaas/admin/ | Approve and Manage requests | Admin |
| /tiaas/stats/ | Overall TIaaS statistics (EU Stats) | Admins, Funding Agencies |
| /tiaas/calendar/ | Calendar of trainings (EU Calendar) | Admins, Funding Agencies |
| /join-training/ID | Join an TIaaS training | Participants |
| /join-training/ID/status | Dashboard with job states of trainees. | Instructors |
Let’s see it in action!
Hands On: Using TIaaS
- Create a new TIaaS request
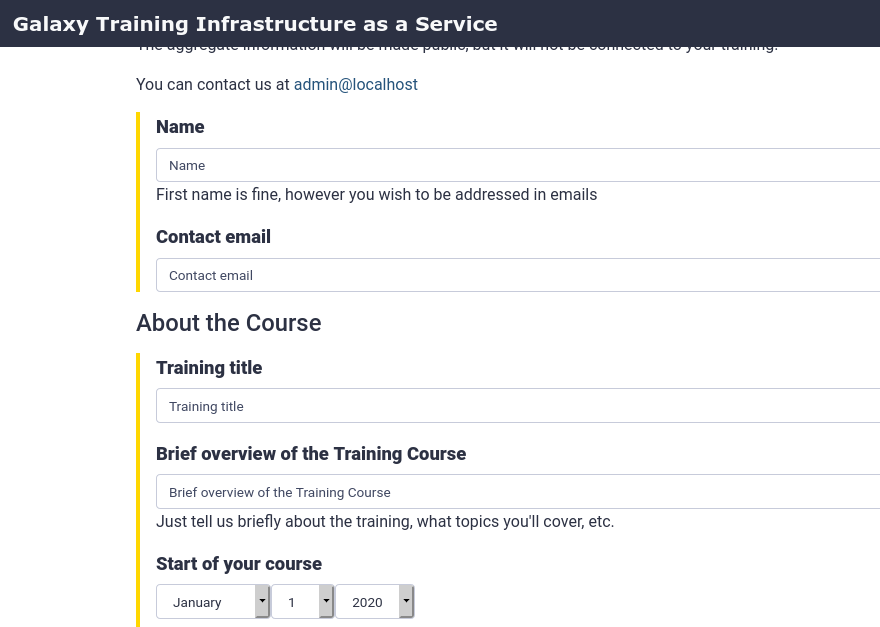
- Go to /tiaas/new
- Here you will find the request form users will fill in to request TIaaS:
- For “Training Identifier”, fill in
gat
- This is the
<training-id>used in the URLs listed above used for:
- Workshop participants to join the tiaas group
- Workshop instructors to monitor the progress of their participants.
- Fill in the rest of the form as you like
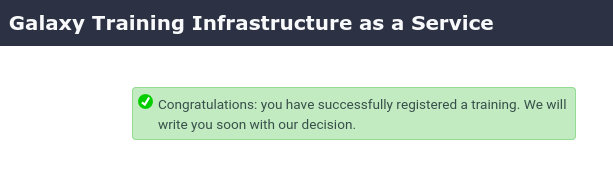
- Submit the form and you should see a confirmation dialog:
- Approve TIaaS request
- Next, the request will have to be approved by an admin
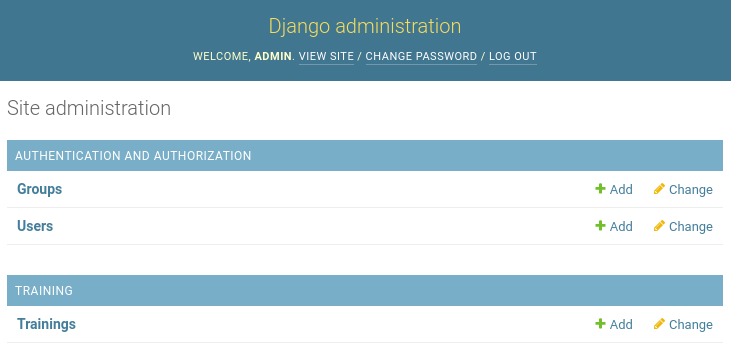
- Go to /tiaas/admin
- Log in using the values you configured
tiaas_admin_userandtiaas_admin_passin your group variables file
- Default values were
admin:changeme- You should now see the admin panel:
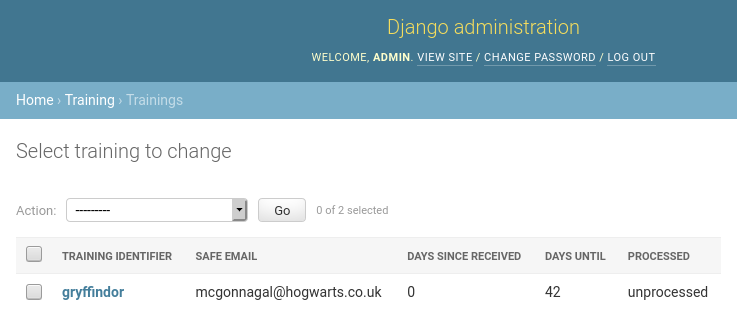
- Click on Trainings, you should see the TIaaS request listed here:
- Approve the request
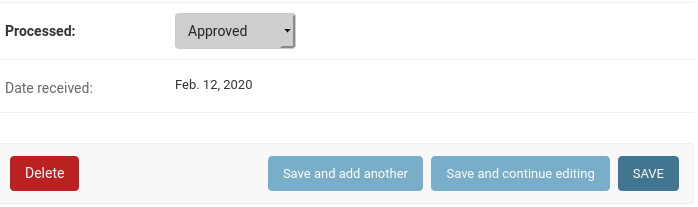
- Click on the training
- Scroll down to the bottom
- Change “Processed” to
Approvedand Save- At this point, you would likely email the person who made the request to inform them of approval
- Join TIaaS Training
- Make sure you are logged in to Galaxy
- On the day of the workshop, participants will visit a following URL to join the TIaaS group
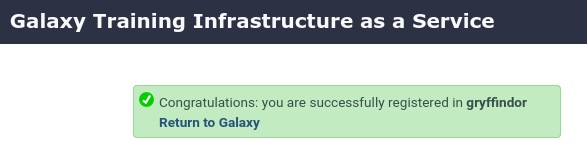
- /join-training/gat
- A confirmation dialog should appear if all went well:
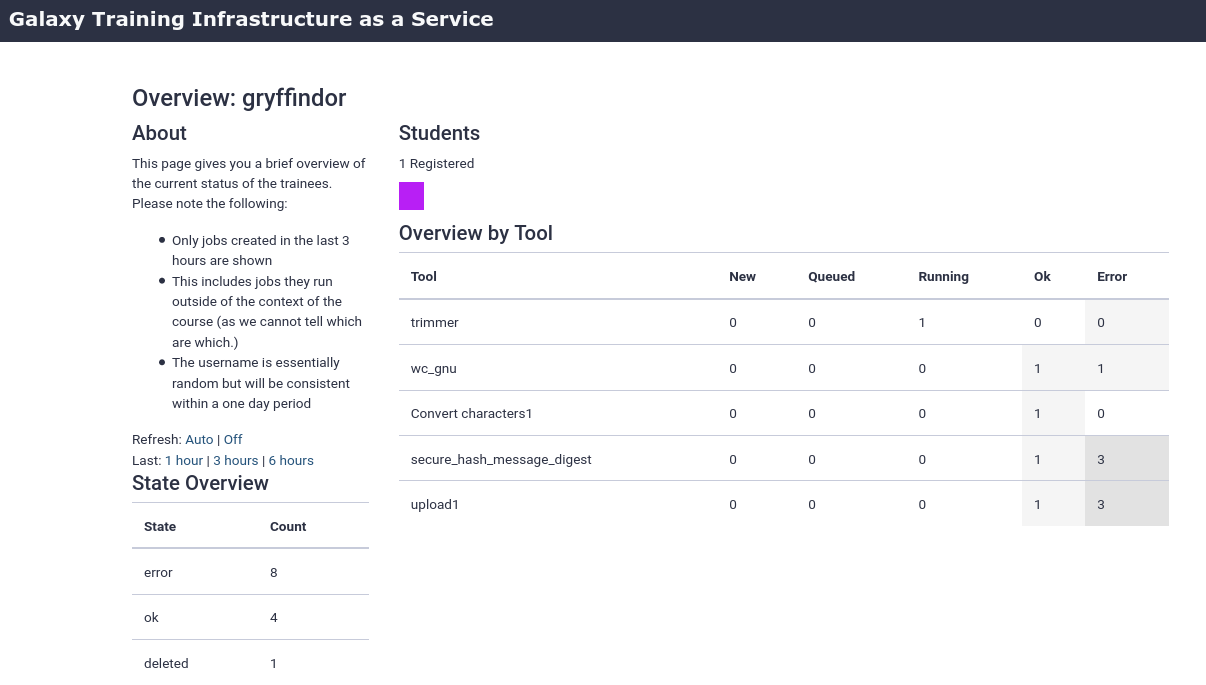
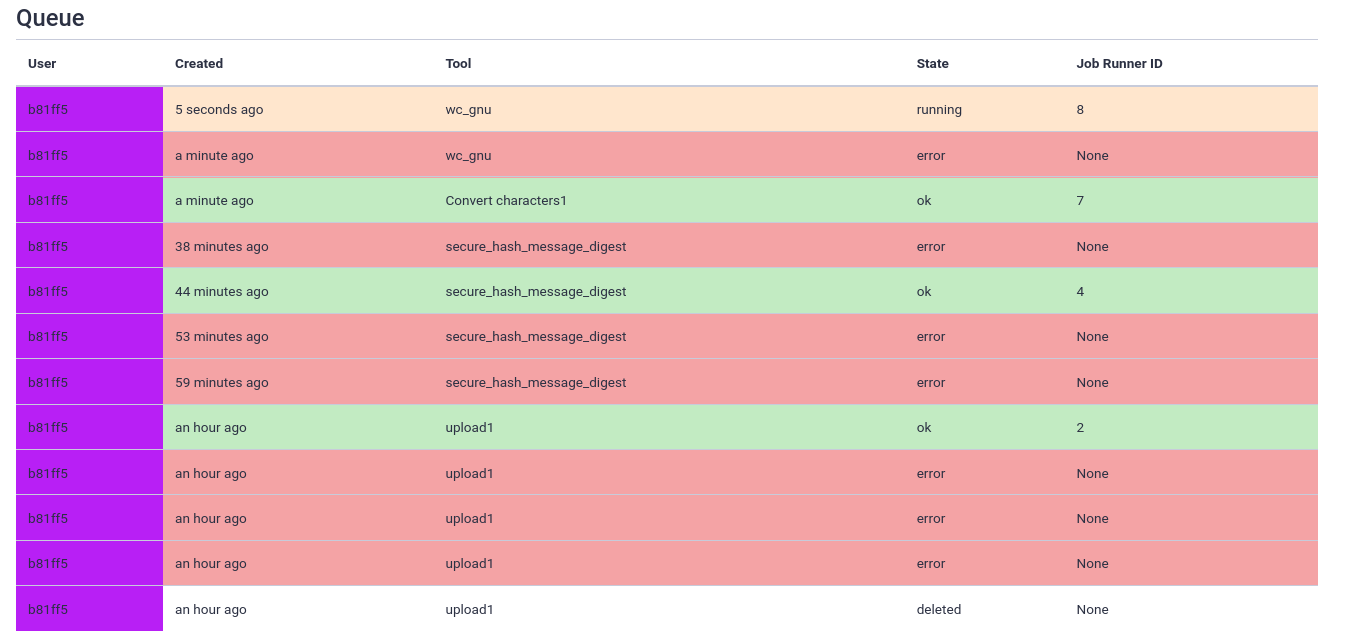
- Monitor TIaaS status
- This is very useful for instructors to monitor the job state of their participants
- Go to /join-training/gat
- In the Dasboard you should see that one user (you) has joined the training \
- Run some jobs to see the dashboard in action
- Scroll down to get some more information on a per-user level (anonymized)
- Every user designated by their own identifier and colour, but no personal information
Comment: Note: GDPR assistanceSince this setup tracks additional personal information (submitter name & email, users in the queue view), TIaaS includes some always-on features to assist with your GDPR compliance.
- Users in public status dashboard are only visible by an anonymized identifier and colour
- Email addressses in the TIaaS admin panel will be automatically expunged 60 days after a training event
Of course you need to review any GDPR compliance concerns with your group’s legal representative(s), this only attempts to ensure some protections exist for the users of the system.
Job Configuration
While observability for teachers or trainers is already a huge benefit, one of the primary benefits of TIaaS is that your jobs get sent to dedicated compute resources, which won’t be used by anyone else, during the period of the training. We will send all of the training jobs to pulsar if you have completed that tutorial, or one of the slurm destinations from the job configuration training.
In order to achieve this, we first need some way to sort the jobs of the training users into these private queues, while letting the other jobs continue on. So let’s create a traffic controller to figure out where jobs belong.
Hands On: Writing a dynamic job destination
This destination will check that the
user_emailis in a training group (role starting withtraining-).--- a/files/galaxy/config/tpv_rules_local.yml +++ b/files/galaxy/config/tpv_rules_local.yml @@ -35,6 +35,15 @@ tools: require: - pulsar +roles: + training.*: + max_cores: 2 + max_mem: max_cores * 3.8 # TODO check multiplier + scheduling: + require: + - slurm + - training + destinations: local_env: runner: local_runner @@ -64,6 +73,19 @@ destinations: max_mem: 8 params: native_specification: --nodes=1 --ntasks=1 --cpus-per-task={cores} --mem={round(mem*1024)} --time={entity.params['walltime']}:00:00 + slurm-training: + inherits: singularity + runner: slurm + max_accepted_cores: 12 + max_accepted_mem: 120 + max_cores: 2 # Limit the cores + max_mem: 8 # Limit the memory + params: + native_specification: --nodes=1 --ntasks=1 --mem={round(mem*1024)} --cpus-per-task={cores} --time=00:30:00 + scheduling: + require: + - slurm + - training pulsar: runner: pulsar_runnerRun the playbook
Code In: Bashansible-playbook galaxy.ymlEnsure your user is joined to a training
Run a job and observe the logs to see where it goes (
journalctl -u galaxy -f)
Congratulations! you have now set up TIaaS on your Galaxy server.
2.sh
Hands On: Time to git commitIt’s time to commit your work! Check the status with
git statusAdd your changed files with
git add ... # any files you see that are changedAnd then commit it!
git commit -m 'Finished Training Infrastructure as a Service (TIaaS)'
Comment: Got lost along the way?If you missed any steps, you can compare against the reference files, or see what changed since the previous tutorial.
If you’re using
gitto track your progress, remember to add your changes and commit with a good commit message!
Comment: Galaxy Admin Training PathThe yearly Galaxy Admin Training follows a specific ordering of tutorials. Use this timeline to help keep track of where you are in Galaxy Admin Training.
You've Finished the Tutorial
Key points
TIaaS is an additional service you can deploy which can help you provide a better service to your users
Frequently Asked Questions
Have questions about this tutorial? Have a look at the available FAQ pages and support channelsGlossary
- TIaaS
- Training Infrastructure as a Service
Feedback
Did you use this material as an instructor? Feel free to give us feedback on how it went.
Did you use this material as a learner or student? Click the form below to leave feedback.

Citing this Tutorial
- Helena Rasche, Saskia Hiltemann, Training Infrastructure as a Service (TIaaS) (Galaxy Training Materials). https://training.galaxyproject.org/training-material/topics/admin/tutorials/tiaas/tutorial.html Online; accessed TODAY
- Hiltemann, Saskia, Rasche, Helena et al., 2023 Galaxy Training: A Powerful Framework for Teaching! PLOS Computational Biology 10.1371/journal.pcbi.1010752
- Batut et al., 2018 Community-Driven Data Analysis Training for Biology Cell Systems 10.1016/j.cels.2018.05.012
Congratulations on successfully completing this tutorial!@misc{admin-tiaas, author = "Helena Rasche and Saskia Hiltemann", title = "Training Infrastructure as a Service (TIaaS) (Galaxy Training Materials)", year = "", month = "", day = "", url = "\url{https://training.galaxyproject.org/training-material/topics/admin/tutorials/tiaas/tutorial.html}", note = "[Online; accessed TODAY]" } @article{Hiltemann_2023, doi = {10.1371/journal.pcbi.1010752}, url = {https://doi.org/10.1371%2Fjournal.pcbi.1010752}, year = 2023, month = {jan}, publisher = {Public Library of Science ({PLoS})}, volume = {19}, number = {1}, pages = {e1010752}, author = {Saskia Hiltemann and Helena Rasche and Simon Gladman and Hans-Rudolf Hotz and Delphine Larivi{\`{e}}re and Daniel Blankenberg and Pratik D. Jagtap and Thomas Wollmann and Anthony Bretaudeau and Nadia Gou{\'{e}} and Timothy J. Griffin and Coline Royaux and Yvan Le Bras and Subina Mehta and Anna Syme and Frederik Coppens and Bert Droesbeke and Nicola Soranzo and Wendi Bacon and Fotis Psomopoulos and Crist{\'{o}}bal Gallardo-Alba and John Davis and Melanie Christine Föll and Matthias Fahrner and Maria A. Doyle and Beatriz Serrano-Solano and Anne Claire Fouilloux and Peter van Heusden and Wolfgang Maier and Dave Clements and Florian Heyl and Björn Grüning and B{\'{e}}r{\'{e}}nice Batut and}, editor = {Francis Ouellette}, title = {Galaxy Training: A powerful framework for teaching!}, journal = {PLoS Comput Biol} }