Frequently Asked Questions
Tutorial Questions
Defining a Learning Pathway
Learning Pathways are sets of tutorials curated by community experts to form a coherent set of lessons around a topic, building up knowledge step by step.
To define a learning pathway, create a file in the
learning-pathways/folder. An example file is also given in this folder (pathway-example.md). It should look something like this:---
layout: learning-pathway
title: Title of your pathway
description: |
Description of the pathway. What will be covered, what are the learning objectives, etc?
Make this as thorough as possible, 1-2 paragraphs. This appears on the index page that
lists all the learning paths, and at the top of the pathway page
tags: [some, keywords, here ]
cover-image: path/to/image.png # optional cover image, defaults to GTN logo
cover-image-alt: alt text for this image
pathway:
- section: "Module 1: Title"
description: |
description of the module. What will be covered, what should learners expect, etc.
tutorials:
- name: galaxy-intro-short
topic: introduction
- name: galaxy-intro-101
topic: introduction
- section: "Module 2: Title"
description: |
description of the tutorial
will be shown under the section title
tutorials:
- name: quality-control
topic: sequence-analysis
- name: mapping
topic: sequence-analysis
- name: general-introduction
topic: assembly
- name: chloroplast-assembly
topic: assembly
- name: "My non-GTN session"
external: true
link: "https://example.com"
type: hands_on # or 'slides'
# you can make as many sections as you want, with as many tutorials as you want
---
You can put some extra information here. Markdown syntax can be used. This is shown after the description on the pathway page, but not on the cards on the index page.And that’s it!
We are happy to receive contributions of learning pathways! Did you teach a workshop around a topic using GTN materials? Capture the program as a learning pathways for others to reuse!
Adr
GTN ADR: Image Storage
Context and Problem Statement
Contributors to the GTN have image and occasionally datasets they wish to include in the GTN. These datasets are generally quite small (kilobytes) but, are necessary for the understanding of a tutorial.
Decision Drivers
- We prioritise contributor UX very highly, we cannot ask them to learn multiple systems. Git + Markdown is already enough.
- We wish to be able to sufficiently serve the website offline, with just a clone.
Considered Options
- Storage in git directly
- In another system (e.g. S3)
- Allowing linked images anywhere on the internet.
Decision Outcome
Chosen option: “Storage in git directly”, because it is the simplest solution that meets our requirements, and doesn’t require development we cannot fund, and doesn’t risk dead links over time.
Consequences
- Good, because it is simple and doesn’t require additional development.
- Bad, because it will permanently inflate the size of the repository, and it will never decrease. (We can offset this with
Pros and Cons of the Options
Storage in S3
- Good, because it’s cheap and well known.
- Bad, because we would need to build a way for users to upload images as part of a GTN tutorial development, and then link to them in markdown.
- Bad, because then the website would not be hostable offline.
Hotlinking
- Good, because it’s easy for contributors
- Bad, because unnecessary impact on someone else’s bandwidth
- Bad, because the links will rot over time, images and tutorials will not be able to be followed.
GTN ADR: Why Jekyll and not another Static Site Generator (SSG)
Context and Problem Statement
We needed a static site generator for the GTN, one had to be chosen. We chose Jekyll because of it’s good integration with GitHub and GitHub Pages. Over time our requirements have changed but we still need one SSG.
Decision Drivers
- Must be easy for contributors to setup and use
- Needs to be relatively performant (full rebuilds may not take more than 2 minutes.)
- Must allow us to develop custom plugins
Considered Options
- Jekyll
- Hugo
- A javascript option
- Another SSG.
Decision Outcome
Chosen option: “Jekyll”, because of the amount of time and effort we have sunk into it over the years has made it a good platform for us, despite limitations.
Over time we have invested heavily into Jekyll, any choice to switch must take that into consideration. Consider the following output of
scc _plugins bin/
Language Files Lines Blanks Comments Code Complexity YAML 117 9830 71 33 9726 0 Ruby 90 14471 1795 2617 10059 1163 JSON 48 3075 0 0 3075 0 Python 24 3693 284 272 3137 310 Shell 21 1529 175 262 1092 84 JavaScript 5 299 38 19 242 48 Markdown 4 76 19 0 57 0 Dockerfile 2 60 15 1 44 14 Plain Text 2 18 0 0 18 0 BASH 1 51 8 4 39 1 CSS 1 3 0 0 3 0 Docker ignore 1 1 0 0 1 0 gitignore 1 123 0 0 123 0 Total 317 33229 2405 3208 27616 1620
- Estimated Cost to Develop (organic) $880,671
- Estimated Schedule Effort (organic) 13.11 months
- Estimated People Required (organic) 5.97
- Processed 1081253 bytes, 1.081 megabytes (SI)
This is a lot of code that would need to be rewritten if another language was ever chosen.
The YAML comprises our Kwalify Schemas. There is a good argument for moving to JSON Schema instead. The Ruby however is the bulk of the code that would need to be rewritten. It does a significant number of complex things:
- collecting and collating files off disk / in Jekyll’s Page model into “Learning Materials”, very large objects with hundreds of properties that are used to render each and every template.
- Generating hundreds of pages with a multitude of calculated properties. These would all need to be hand translated.
Additionally any layouts would need to be rewritten from our existing Liquid templates. Note that this is not the full set of templates.
Language Files Lines Blanks Comments Code Complexity HTML 69 5937 830 96 5011 0 Markdown 4 125 1 0 124 0 Total 73 6062 831 96 5135 0
- Estimated Cost to Develop (organic) $150,543
- Estimated Schedule Effort (organic) 6.70 months
- Estimated People Required (organic) 2.00
Consequences
- Good, because it works well for us and has scaled sufficiently to an incredible number of output pages (~7k html/22k files in a full GTN production deployment.) with acceptable build times (<5 minutes in prod, most of the action execution is taken up by contacting other servers, dependencies, and uploading the results.)
- Good, because it has a well supported ecosystem of plugins we can leverage for common tasks
- Good, because we can easily write our own plugins for many tasks.
- Bad, because we it remains difficult to install
- Bad, because people must know Ruby and very few people do (but it isn’t that hard to learn!)
Pros and Cons of the Options
Hugo
- Good, because it would be a single binary, easier to install
- Bad, because plugins do not exist, it does not have a way to hook the internals and work with them which we use extensively.
- Bad, because what plugins do exist, only exist as ‘shortcodes’ that are written in Go templates which are not as powerful as Ruby.
A JavaScript option
- Good, because we could re-use code from other places
- Bad, because the average lifetime of a JavaScript SSG is maybe one year.
- Bad, because they are also quite slow on average (Hub compile times are on the order of 10 minutes.)
GTN Architectural Decision Record Template
This is based on Markdown Architectural Decision Record and lets us record important decisions.
{short title, representative of solved problem and found solution}
Context and Problem Statement
{Describe the context and problem statement, e.g., in free form using two to three sentences or in the form of an illustrative story. You may want to articulate the problem in form of a question and add links to collaboration boards or issue management systems.}
Decision Drivers
- {decision driver 1, e.g., a force, facing concern, …}
- {decision driver 2, e.g., a force, facing concern, …}
- …
Considered Options
- {title of option 1}
- {title of option 2}
- {title of option 3}
- …
Decision Outcome
Chosen option: “{title of option 1}”, because {justification. e.g., only option, which meets k.o. criterion decision driver which resolves force {force} … comes out best (see below)}. Consequences
- Good, because {positive consequence, e.g., improvement of one or more desired qualities, …}
- Bad, because {negative consequence, e.g., compromising one or more desired qualities, …}
- …
Confirmation
{Describe how the implementation of/compliance with the ADR can/will be confirmed. Are the design that was decided for and its implementation in line with the decision made? E.g., a design/code review or a test with a library such as ArchUnit can help validate this. Not that although we classify this element as optional, it is included in many ADRs.}
Pros and Cons of the Options
{title of option 1}
{example | description | pointer to more information | …}
- Good, because {argument a}
- Good, because {argument b}
- Neutral, because {argument c}
- Bad, because {argument d}
- …
{title of other option}
{example description pointer to more information …}
- Good, because {argument a}
- Good, because {argument b}
- Neutral, because {argument c}
- Bad, because {argument d}
- …
More Information
{You might want to provide additional evidence/confidence for the decision outcome here and/or document the team agreement on the decision and/or define when/how this decision the decision should be realized and if/when it should be re-visited. Links to other decisions and resources might appear here as well.}
What is an Architectural Decision Record (ADR)?
ADRs are documents that captures an important architectural decision made along with its context and consequences.
We keep track of some of our important Architecture decisions using a template based on Markdown Architectural Decision Record.
We feel that it is important to document these decisions to help future GTN maintainers understand the context and consequences of the decisions made in the past.
A number of our decisions were made with very explicit intentions, usually to prioritise contributors and ensure they have the best possible experience, maximising this over technical complexity and engineering efforts that are required to support it.
Most of our ADRs follow this pattern: Learners and Contributors come first, developers and deployers will be considered where possible.
Github
Forking the GTN repository
- Go on the GitHub repository: github.com/galaxyproject/training-material
- Click on the Fork button (top-right corner of the page)

Posting issues and ideas for the Galaxy Community
The Galaxy community addresses issues and needs through resolving issues on Github.
Help you
Are you struggling to analyse something and need help?
Perhaps a tool isn’t working, or something similar?
- For reporting Usage Problems, related to tools and functions, head to the Galaxy Help site.
- Red Error Datasets:
- Refer to the Troubleshooting errors FAQ for red error in datasets.
- Unexpected results in Green Success Dataset:
- To resolve it you may be asked to send in a shared history link and possibly a shared workflow link. For sharing your history, refer to this these instructions.
- To reach our support team, visit Support FAQs.
- Functionality problems:
- Using Galaxy Help is the best way to get help in most cases.
- If the problem is more complex, email a description of the problem and how to reproduce it.
- Administrative problems:
- If the problem is present in your own Galaxy, the administrative configuration may be a factor.
- For the fastest help directly from the development community, admin issues can be alternatively reported to the mailing list or the GalaxyProject Gitter channel.
- For Security Issues, do not report them via GitHub. Kindly disclose these as explained in this document.
- For Bug Reporting, create a Github issue. Include the steps mentioned in these instructions.
- Search the GTN Search to find prior Q & A, FAQs, tutorials, and other documentation across all Galaxy resources, to verify in case your issue was already faced by someone.
Help Galaxy
Alternatively, have you found a definite problem with Galaxy and/or had an idea that could improve Galaxy?
Report an Issue on the correct Github repository:
Tools: Need a tool added to a server? Check out the FAQ for this:
To request tools that already exist in the Galaxy toolshed, but not in your server, please raise an issue at:
Europe - usegalaxy.eu | https://github.com/usegalaxy-eu/usegalaxy-eu-tools
USA - usegalaxy.org | https://github.com/galaxyproject/usegalaxy-tools
Australia - usegalaxy.org.au | https://site.usegalaxy.org.au/request/tool
Tools: Problem in a tool, such as a parameter you want to use is missing: Select your tool in the Galaxy interface Drop-down arrow to See in Tool Shed Development repository , then describe the issue there - Tools: Request for developers to wrap a tool: Either you will have a domain-specific location (such as the Single-cell & sPatial Omics Community tool request form or you can post the request in our Intergalatic Utilities Commission: https://github.com/galaxyproject/tools-iuc
- User interface: https://github.com/galaxyproject/galaxy
- Subdomains / Galaxy Labs: Specific community content: https://github.com/galaxyproject/galaxy_codex or General Galaxy Labs issue: https://github.com/usegalaxy-au/galaxy-labs-engine
- Galaxy Community Hub: https://github.com/galaxyproject/galaxy-hub/
- Galaxy Training Network: https://github.com/galaxyproject/training-material
Warning: Be thorough!Remember to be thorough when posting issues! Consider the FAQ on posting!
Writing bug reports is a good skill to have as bioinformaticians, and a key point is that you should include enough information from the first message to help the process of resolving your issue more efficient and a better experience for everyone.
What to include
- Which commands did you run, precisely, we want details. Which flags did you set?
- Which server(s) did you run those commands on?
- What account/username did you use?
- Where did it go wrong?
- What were the stdout/stderr of the tool that failed? Include the text.
- Did you try any workarounds? What results did those produce?
- (If relevant) screenshot(s) that show exactly the problem, if it cannot be described in text. Is there a details panel you could include too?
- If there are job IDs, please include them as text so administrators don’t have to manually transcribe the job ID in your picture.
It makes the process of answering ‘bug reports’ much smoother for us, as we will have to ask you these questions anyway. If you provide this information from the start, we can get straight to answering your question!
What does a GOOD bug report look like?
The people who provide support for Galaxy are largely volunteers in this community, so try and provide as much information up front to avoid wasting their time:
I encountered an issue: I was working on (this server> and trying to run (tool)+(version number) but all of the output files were empty. My username is jane-doe.
Here is everything that I know:
- The dataset is green, the job did not fail
- This is the standard output/error of the tool that I found in the information page (insert it here)
- I have read it but I do not understand what X/Y means.
- The job ID from the output information page is 123123abdef.
- I tried re-running the job and changing parameter Z but it did not change the result.
Could you help me?
What we ask from anyone raising an issue, is that you be willing to follow up with us. We may need more information or have different ideas, and it would be very helpful to continue the conversation to make the best fix or feature!
Syncing your Fork of the GTN
Whenever you want to contribute something new to the GTN, it is important to start with an up-to-date branch. To do this, you should always update the main branch of your fork, before creating a so-called feature branch, a branch where you make your changes.
- Point your browser to your fork of the GTN repository
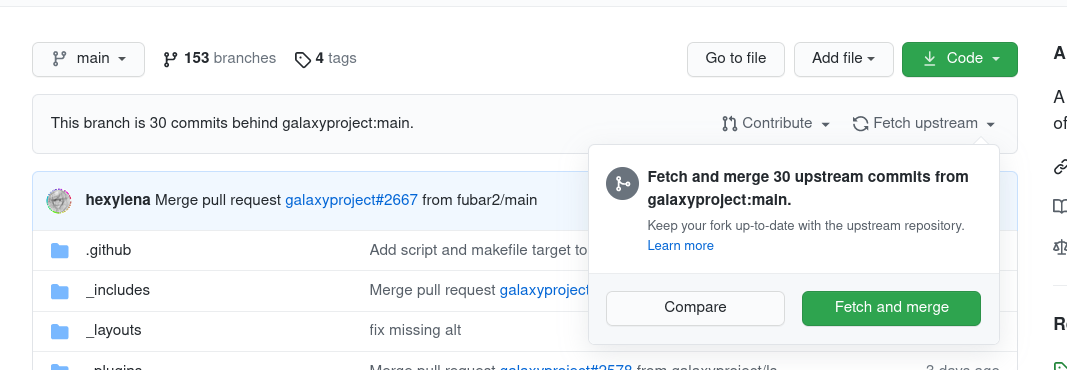
- The url will be
https://github.com/<your username>/training-material(replacing ‘your username’ with your GitHub username)You might see a message like “This branch is 367 commits behind galaxyproject/training-material:main.” as in the screenshot below.
Click the Sync Fork button on your fork to update it to the latest version.
- TIP: never work directly on your main branch, since that will make the sync process more difficult. Always create a new branch before committing your changes.
Updating the default branch from master to main
If you created your fork a long time ago, the default branch on your fork may still be called master instead of main
- Point your browser to your fork of the GTN repository
- The url will be
https://github.com/<your username>/training-material(replacingwith your GitHub username) Check the default branch that is shown (at top left).
- Does it say
main?
- Congrats, nothing to do, you can skip the rest of these steps
Does it say
master? Then you need to update it, following the instructions below- Go to your fork’s settings (Click on the gear icon called “Settings”)
- Find “Branches” on the left
- If it says master you can click on the ⇆ icon to switch branches.
- Select
main(it may not be present).- If it isn’t present, use the pencil icon to rename
mastertomain.
Gtn
Annotating Pre-requisites
If you are adding a tutorial, annotating the pre-requisites is an important task! It will help ensure learners know what they need to know before starting the tutorial. They also let instructors plan a schedule optimally.
Internal requirements often include specific features of Galaxy you plan to use in your training material, and let learners know which tutorials to follow first, before starting your tutorial.
requirements:
  - type: "internal"
    topic_name: galaxy-interface
    tutorials:
      - collections
      - upload-rules
Or you can have external requirements, which link to another site.
requirements:
  -
    type: "external"
    title: "Trackster"
    link: "https://wiki.galaxyproject.org/Learn/Visualization"
Least commonly needed are software requirements. These are usually used in e.g. Galaxy Admin Training tutorials, but if you have specific software requirements, you can list them here:
requirements:
- type: none
  title: "Web browser"
- type: none
  title: "A linux-based machine or linux emulator"
- type: none
Input Histories & Answer Keys
Tutorials sometimes require significant amounts of data or data prepared in a very specific manner which often is shown to cause errors for learners that significantly affect downstream results. Input histories are an answer to that:
input_histories:
  - label: "UseGalaxy.eu"
    history: https://humancellatlas.usegalaxy.eu/u/wendi.bacon.training/h/cs1pre-processing-with-alevin---input-1
    date: "2021-09-01"
Additionally once the learner has gotten started, tutorials sometimes feature tools which produce stochastic outputs, or have very long-running steps. In these cases, the tutorial authors may provide answer histories to help learners verify that they are on the right track, or to enable them to catch up if they fall behind or something goes wrong.
answer_histories:
    - label: "UseGalaxy.eu"
    history: https://humancellatlas.usegalaxy.eu/u/j.jakiela/h/generating-a-single-cell-matrix-using-alevin-3
    - label: "Older Alevin version"
    history: https://humancellatlas.usegalaxy.eu/u/wendi.bacon.training/h/cs1pre-processing-with-alevin---answer-key
    date: 2024-01-01
Finally, to prevent yourself from accidentally changing those tutorial histories, you can Archive History.
- Select galaxy-history-options History Options which is on the top of the list of datasets in the history panel
- Select galaxy-history-archive Archive History
- Select the Archive history button
Your history is now archived! To find it again, you will need to go to Data → Histories → Archived Histories.
Using the new Contributions Annotation framework
If you are writing a tutorial or slides, there are two ways to annotate contributions:
The old way, which doesn’t accurately track roles
contributors: [hexylena, shiltemann]And the new way which lets you annotate who has helped build a tutorial in a much richer way:
contributions:
    authorship:
        - shiltemann
        - bebatut
    editing:
        - hexylena
        - bebatut
        - natefoo
    testing:
        - bebatut
    infrastructure:
        - natefoo
    translation:
        - shiltemann
    funding:
        - gallantries
This is especially important if you want to track funding or infrastructure contributions. The old way doesn’t allow for this, and thus we would strongly recommend you use the new format!
Jekyll
Slow incremental builds
Sometimes cleaning Jekyll’s cache can improve slow (~60s) incremental build times.
jekyll cleanwill do this. If you continue to experience--incrementalbuild (make serve-quick) time issues, please let us know!
Notebooks
Contributing a Jupyter Notebook to the GTN
Problem: I have a notebook that I’d like to add to the GTN.
Solution: While we do not support directly adding notebooks to the GTN, as all of our notebooks are generated from the tutorial Markdown files, there is an alternative path! Instead you can:
- Install
jupytext- Use it to convert the ipynb file into a Markdown file (
jupytext notebook.ipynb --to markdown)- Add this Markdown file to the GTN
- Fix any missing header metadata
Then the GTN’s infrastructure will automatically convert that Markdown file directly to a notebook on deployment. This approach has the advantage that Markdown files are more diff-friendly than ipynb, making it much easier to review updates to a tutorial.