In this tutorial, we will explore a complete pipeline for annotating images and videos of marine species. As an example, we will use a video from the Moorev project, cut into a short clip and available on Zenodo.
This pipeline has two main steps:
Automatic annotation using a text prompt with SAM3 Semantic Segmentation ( Galaxy version 1.0.1+galaxy6)
Correction and validation of the annotations with Edit COCO Annotation ( Galaxy version 1.0.0+galaxy0)
MOOREV: Microclimates and observation tools for the responses of marine life on the seafloor
Observing interactions between marine species facing microclimatic gradients on the shore
The MOOREV project is led by Nadine Le Bris (Sorbonne University, Concarneau Marine Station),
with support from the National Museum of Natural History, the CNRS, and the Fondation de France.
It started in 2022. Its goal is to better understand, and help others understand, the effects of
climate disturbance on coastal biodiversity.
The project uses underwater imaging methods to observe benthic species at the individual level,
across different shore habitats. Groups of school students repeat data collection at their study
sites, which are labelled by the Educational Marine Areas program of the French Biodiversity
Office, across tide cycles, seasons, and years.
The project brings together researchers and environmental education professionals. It is
co-built with school classes and their teachers, using the shore as a natural laboratory. In the
long term, it aims to support protection and conservation measures, taking into account the links
between climate change and marine socio-ecosystems.
The video used in this tutorial is a short clip taken directly from the Moorev project, available on Zenodo. This clip was chosen because it shows most of the features of the tools presented here.
Hands On: Load the video into Galaxy
Create a new history for this tutorial (for example: “Annotation Moorev”)
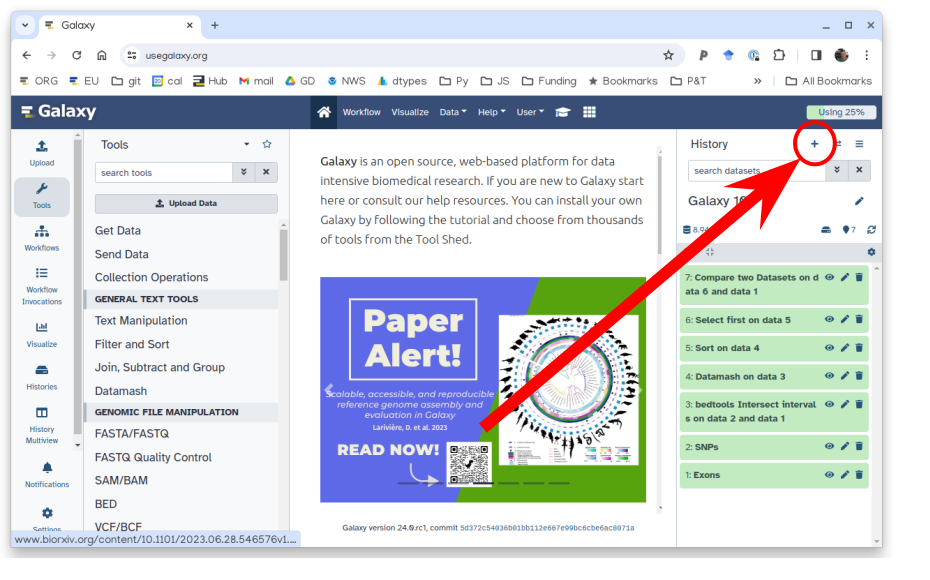
To create a new history simply click the new-history icon at the top of the history panel:
Click on galaxy-pencil (Edit) next to the history name (which by default is “Unnamed history”)
Type the new name
Click on Save
To cancel renaming, click the galaxy-undo “Cancel” button
If you do not have the galaxy-pencil (Edit) next to the history name (which can be the case if you are using an older version of Galaxy) do the following:
Click on Unnamed history (or the current name of the history) (Click to rename history) at the top of your history panel
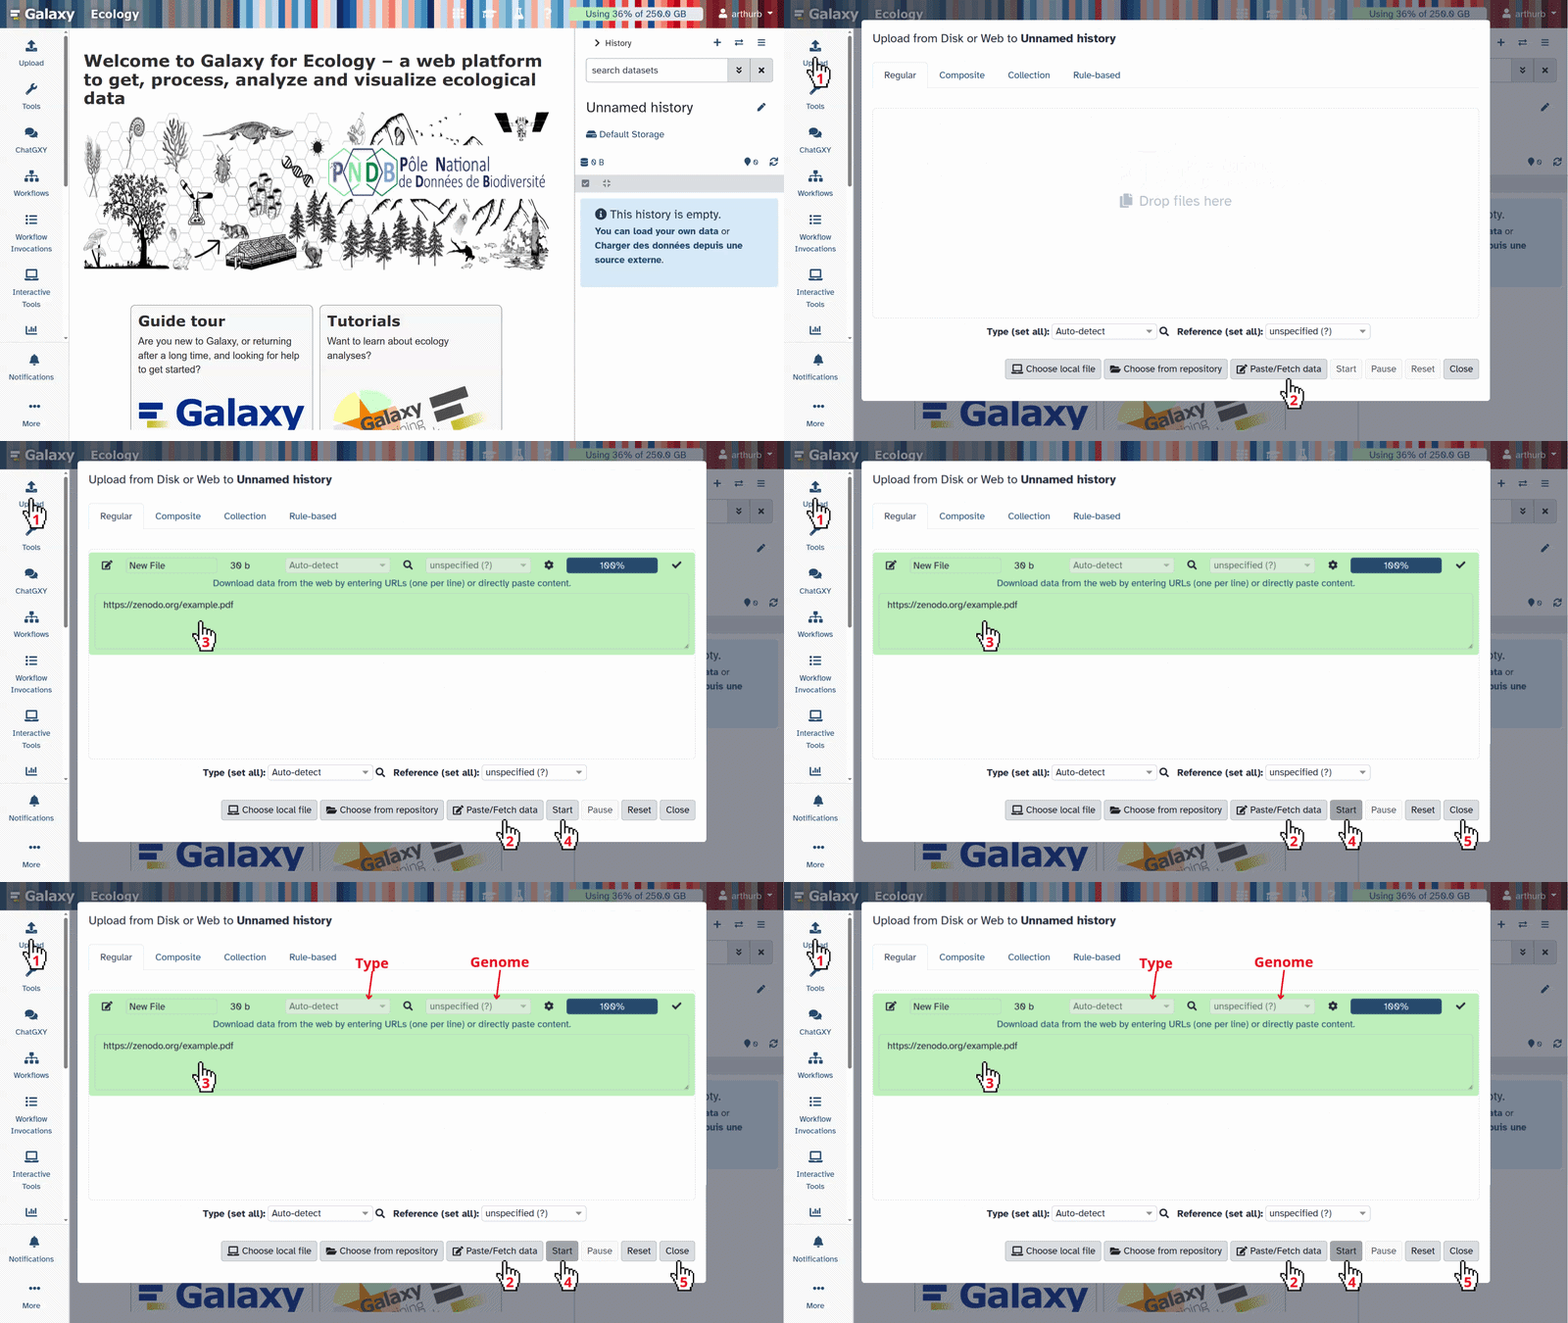
Click galaxy-uploadUpload at the top of the activity panel
Select galaxy-wf-editPaste/Fetch Data
Paste the link(s) into the text field
Press Start
Close the window
Check that the file is shown in green in the history before you continue
Check the datatype
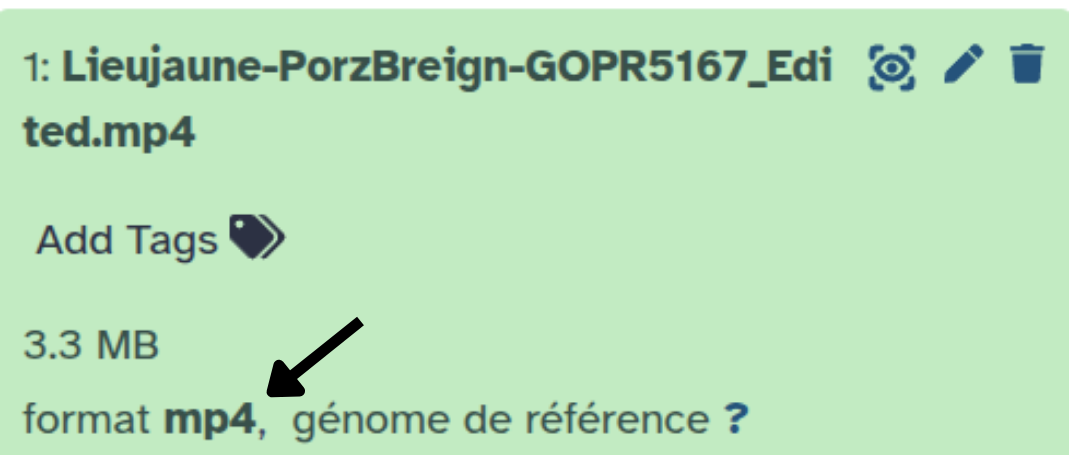
Galaxy assigns the datatype automatically. Since most tools use it to filter their inputs, it is important to make sure it is correct. In our case, check that the type is mp4. If it is not, the import may have had an error, and you can change the type manually.
Click on the galaxy-pencilpencil icon for the dataset to edit its attributes
In the central panel, click galaxy-chart-select-dataDatatypes tab on the top
In the galaxy-chart-select-dataAssign Datatype, select mp4 from “New Type” dropdown
Tip: you can start typing the datatype into the field to filter the dropdown menu
Click the Save button
Automatic annotation with SAM3
SAM3 is a text-guided segmentation model. It automatically detects and segments objects that match your prompt, with no need for previous annotations.
If you want to learn more about SAM3 and its parameters, check out the dedicated tutorial:
SAM3 Tutorial
Hands On: Setting up SAM3
SAM3 Semantic Segmentation ( Galaxy version 1.0.1+galaxy6) with these parameters:
param-file“Model data”: Segment Anything Model 3 (SAM 3) (default)
param-select“Input type”: One video
param-file“Input video file”: 1: Lieujaune-PorzBreign-GOPR5167_Edited.mp4
param-select“Video quality”: Original quality (lossless) (default)
Processing can take several minutes, depending on the length of the video and the server resources. Wait until the outputs turn green in the history.
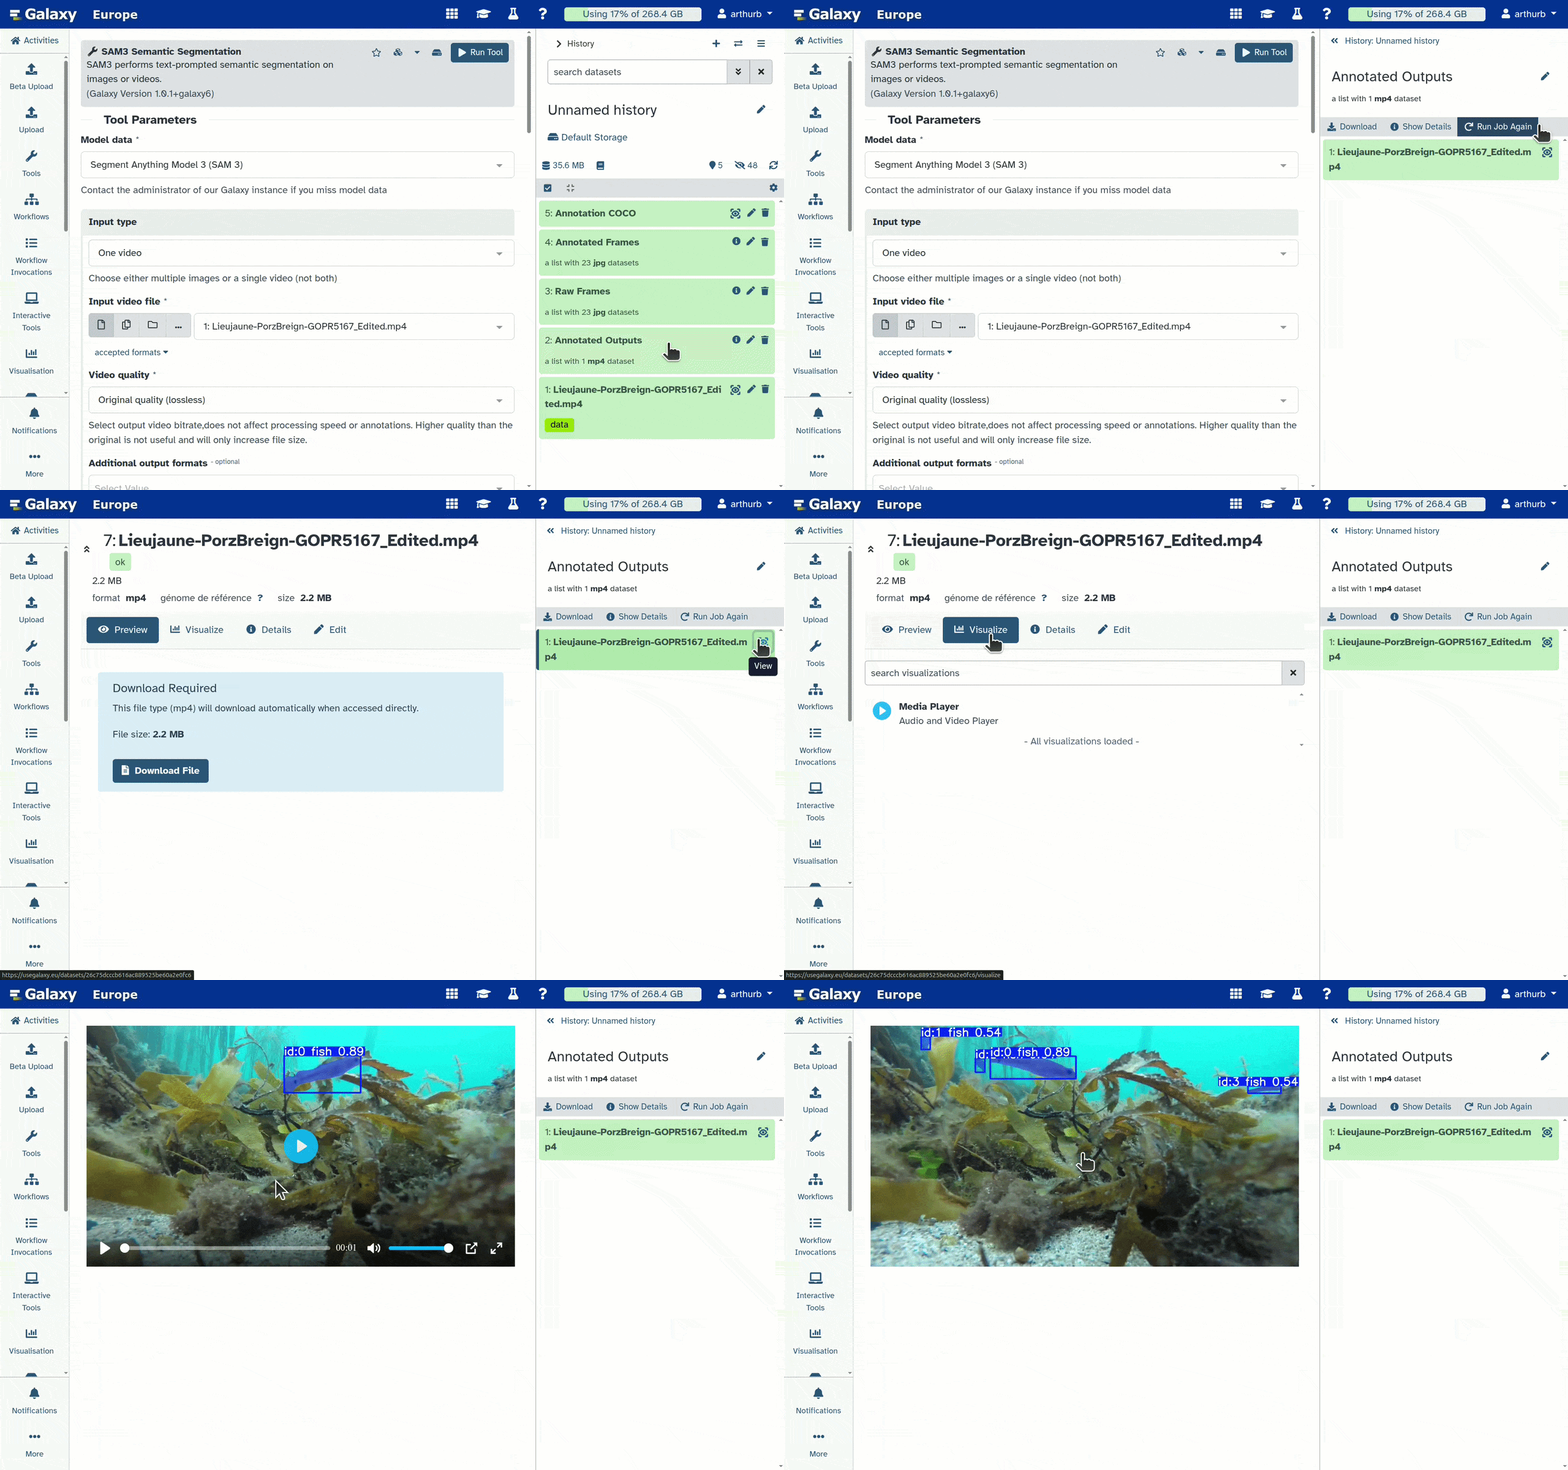
Once it is finished, you will have these items in your history:
5: Annotation COCO: annotations.json — the segmentation masks in COCO format
4: Annotated Frames: the collection of extracted images (annotated)
3: Raw Frames: the collection of extracted images (not annotated)
2: COCO Extracted Frames: the annotated video, for visual checking
Check the results visually by clicking galaxy-eye on Annotated Outputs
Comment: Limits of SAM3
As you can see, not all annotations are perfect. False positives are the most common problem. This is why the next step, correction and validation, is essential.
Correcting and validating the annotations
We will now see how to correct the annotations with Edit COCO Annotation, and then check the result with COCO Annotation Visualizer.
Correcting with Edit COCO Annotation
The Edit COCO Annotation tool lets you modify COCO annotations without opening the images. It has three modes:
Keep: keep only the listed IDs (remove all the others) — useful when only a few IDs need to be kept; it can also rename them
Remove: remove only the listed IDs
Rename: rename the listed IDs without removing any others
Hands On: Keep, remove, or rename annotations
Edit COCO Annotation ( Galaxy version 1.0.0+galaxy0) with these parameters:
param-select“Mode” : Keep - keep only listed IDs (remove all others)
param-repeat“1: Track to keep”
param-text“Track IDs”: 0,4-6
param-text“Rename”: Gobiusculus flavescens
param-text“Frame min”: Empty (default)
param-text“Frame max”: Empty (default)
param-repeat“2: Track to keep”
param-text“Track IDs”: 2
param-text“Rename”: Crenilabre
param-text“Frame min”: Empty (default)
param-text“Frame max”: Empty (default)
param-text“Frame max”: Empty (default)
Comment: The same result in two steps
You can also get the same result in two steps: use Remove to remove IDs 1 and 3, then use Rename to rename the remaining groups.
Note: SAM3 can sometimes give the same Track ID to two different objects at different moments in the video. This is why the Frame min and Frame max parameters were added.
Once it is finished, you will have this item in your history:
54: Edited COCO annotations: the JSON file in COCO format, modified with the parameters set above
Visualizing the annotations with COCO Annotation Visualizer
This tool lets you easily visualize a JSON file in COCO format, shown on top of a video or images. Here we use it to check our annotations after correction.
Hands On: Visualize the COCO annotations
COCO Annotation Visualizer ( Galaxy version 1.0.0) with these parameters:
param-file“Input video file”: 1: Lieujaune-PorzBreign-GOPR5167_Edited.mp4
Further information, including links to documentation and original publications, regarding the tools, analysis techniques and the interpretation of results described in this tutorial can be found here.
Feedback
Did you use this material as an instructor? Feel free to give us feedback on how it went.
Did you use this material as a learner or student? Click the form below to leave feedback.
Hiltemann, Saskia, Rasche, Helena et al., 2023 Galaxy Training: A Powerful Framework for Teaching! PLOS Computational Biology 10.1371/journal.pcbi.1010752
Batut et al., 2018 Community-Driven Data Analysis Training for Biology Cell Systems 10.1016/j.cels.2018.05.012
@misc{imaging-Annotation_AI_Pipeline,
author = "Arthur Barreau and Yvan Le Bras and Nadine Le Bris",
	title = "AI pipeline for annotating marine species (Project Moorev - Marine) (Galaxy Training Materials)",
	year = "",
	month = "",
	day = "",
	url = "\url{https://training.galaxyproject.org/training-material/topics/imaging/tutorials/Annotation_AI_Pipeline/tutorial.html}",
	note = "[Online; accessed TODAY]"
}
@article{Hiltemann_2023,
	doi = {10.1371/journal.pcbi.1010752},
	url = {https://doi.org/10.1371%2Fjournal.pcbi.1010752},
	year = 2023,
	month = {jan},
	publisher = {Public Library of Science ({PLoS})},
	volume = {19},
	number = {1},
	pages = {e1010752},
	author = {Saskia Hiltemann and Helena Rasche and Simon Gladman and Hans-Rudolf Hotz and Delphine Larivi{\`{e}}re and Daniel Blankenberg and Pratik D. Jagtap and Thomas Wollmann and Anthony Bretaudeau and Nadia Gou{\'{e}} and Timothy J. Griffin and Coline Royaux and Yvan Le Bras and Subina Mehta and Anna Syme and Frederik Coppens and Bert Droesbeke and Nicola Soranzo and Wendi Bacon and Fotis Psomopoulos and Crist{\'{o}}bal Gallardo-Alba and John Davis and Melanie Christine Föll and Matthias Fahrner and Maria A. Doyle and Beatriz Serrano-Solano and Anne Claire Fouilloux and Peter van Heusden and Wolfgang Maier and Dave Clements and Florian Heyl and Björn Grüning and B{\'{e}}r{\'{e}}nice Batut and},
	editor = {Francis Ouellette},
	title = {Galaxy Training: A powerful framework for teaching!},
	journal = {PLoS Comput Biol}
}
References
These individuals or organisations provided funding support for the development of this resource
 Arthur Barreau
 Yvan Le Bras
 Nadine Le Bris
 Kevin Payet


Questions:
Open image in new tab