Data submission using ENA upload Tool
| Author(s) |
|
| Editor(s) |
|
| Tester(s) |
|
| Reviewers |
|
OverviewQuestions:
Objectives:
How to prepare sequences for submission to ENA?
How to upload raw sequences to ENA?
Requirements:
Manage sequencing files (ab1, FASTQ, FASTA, FASTQ.GZ)
Clean sequences in an automated and reproducible manner
Perform alignments for each sequence
Have the necessary sequence format to submit to ENA
Submit raw reads to ENA using the ENA upload Tool
Time estimation: 2 hoursSupporting Materials:Published: Dec 13, 2024Last modification: Mar 20, 2025License: Tutorial Content is licensed under Creative Commons Attribution 4.0 International License. The GTN Framework is licensed under MITpurl PURL: https://gxy.io/GTN:T00487version Revision: 2
This tutorial will guide you through the necessary steps to manage and prepare sequencing files (ab1, FASTQ, FASTA) for submission to the genomic database ENA. This workflow will take you from raw sequences in AB1 format through all the necessary steps to integrate these sequences into the ENA genomic database. We will convert the files into FASTQ and FASTA formats after performing quality control. Additionally, we will perform alignments with the NCBI database to ensure the accuracy of your sequences.You will then need to fill a metadata Excel template to use the ENA upload Tool. The worklow is made of 17 Galaxy tools, we will present them and explain what they do. The goal is to present an accessible and reproductible workflow for data submission.
AgendaIn this tutorial, we will cover:
Prepare raw data
Hands On: Data Upload
Create a new history for this tutorial
To create a new history simply click the new-history icon at the top of the history panel:
Import the raw sequences files.
https://data.indores.fr/api/access/datafile/3673
https://data.indores.fr/api/access/datafile/3609
- Copy the link location
Click galaxy-upload Upload at the top of the activity panel
- Select galaxy-wf-edit Paste/Fetch Data
Paste the link(s) into the text field
Press Start
- Close the window
- Rename galaxy-pencil your datafiles
3673becomesA2_RC_8F2_B.pl_HCOI.ab13609becomesA12_RC_9G4_B.md_HCOI.ab1
- Click on the galaxy-pencil pencil icon for the dataset to edit its attributes
- In the central panel, change the Name field
- Click the Save button
- Check the datatype
- Make sure it is
ab1, and change it if not.
- Click on the galaxy-pencil pencil icon for the dataset to edit its attributes
- In the central panel, click galaxy-chart-select-data Datatypes tab on the top
- In the galaxy-chart-select-data Assign Datatype, select your desired datatype from “New Type” dropdown
- Tip: you can start typing the datatype into the field to filter the dropdown menu
- Click the Save button
Build a Collection containing these two files, you can ame i “ab1” for example
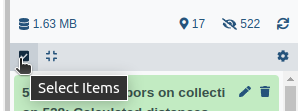
- Click on galaxy-selector Select Items at the top of the history panel
- Check all the datasets in your history you would like to include
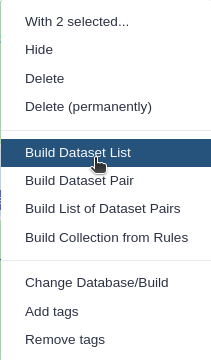
Click n of N selected and choose Advanced Build List
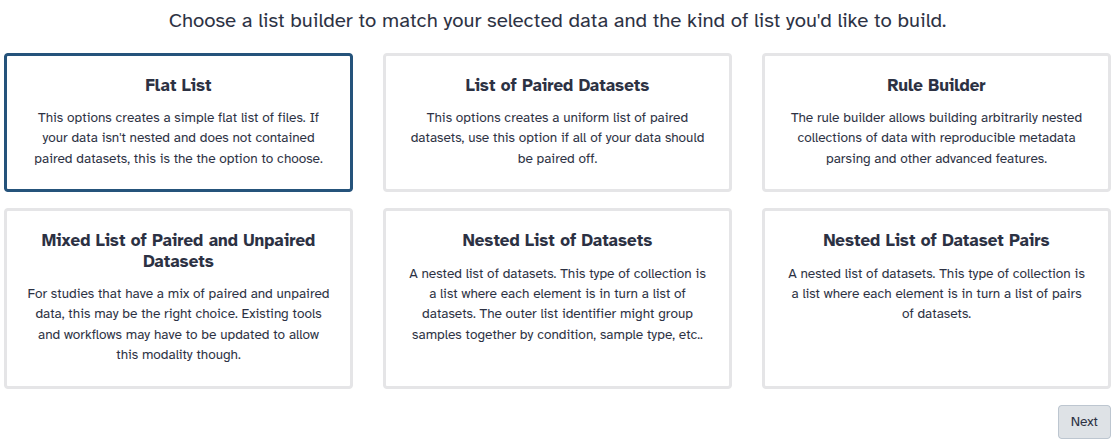
You are in collection building wizard. Choose Flat List and click ‘Next’ button at the right bottom corner.
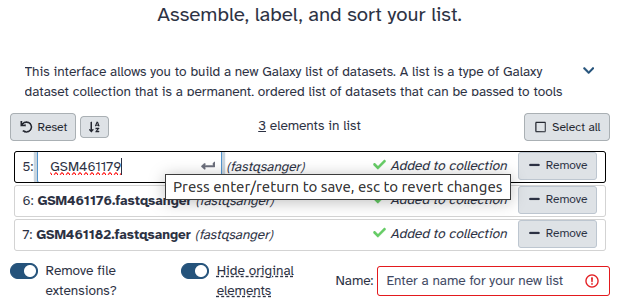
Double clcik on the file names to edit. For example, remove file extensions or common prefix/suffixes to cleanup the names.
- Enter a name for your collection
- Click Build to build your collection
- Click on the checkmark icon at the top of your history again
Tools used in the “Prepare Data submission” Workflow
Following steps take as input ab1 sequences files and produce filtered FastQ and Fasta files so sequences passing the quality checks are compared to NCBI nucleotidic database using Blastn operation.
Converting Ab1 files to FASTQ
Hands On: ab1 to FASTQ converter
- ab1 to FASTQ converter ( Galaxy version 1.20.0) with the following parameters:
- param-collection “Input ab1 file”:
ab1data collection created at the previous step
Quality Control
We are doing a first Quality control on the raw files using Falco and MultiQC. Falco is an efficiency optimized rewrite of FastQC.
Hands On: Falco
- Falco ( Galaxy version 1.2.4+galaxy0) with the following parameters:
- param-file “Raw read data from your current history”:
ab1.fastqdata collection created at the previous step- MultiQC ( Galaxy version 1.11+galaxy1) with the following parameters:
- In “Results”:
- param-repeat “Insert Results”
- “Which tool was used generate logs?”:
FastQC(no matter whether FastQC or Falco was used)- In “FastQC output”:
- param-file “RawData FastQC output”:
Falco on collection X:data collection created at the previous step- Check on the HTML files the general quality statistics of your sequences
Question: Question
- What is the quality of your sequences?
- Do you have adapters?
Quality is quite good looking at the “status checks” section of MultiQC. As expected (because here we only have one sequence by file) “Per base sequence Content” and “Overrepresented sequences” Sections are “bad” for both sequences files. “adapter content” section also show a “bad” result for A2_RC_8F2_B.pl_HCOI.ab1 file.
A2_RC_8F2_B.pl_HCOI.ab1 file seems to have adapters in it.
Cleaning the Data
Cutadapt
Cutadapt enables the removal of adapters, polyA tails, and other artifacts from sequences. The tool also filters reads based on quality.
Hands On: Cutadapt
- Cutadapt ( Galaxy version 4.8+galaxy0) with the following parameters:
- param-collection “FASTQ/A file”: the collection with your data (output of tool ab1 to FastQ converter)
- “Single-end or Paired-end reads?”:
Single-end- In “Other Read Trimming Options”:
- “Quality cutoff(s) (R1)”:
30- “Shortening reads to a fixed length”:
DisabledComment: SuggestionsYou may consider changing these parameters depending on the quality of your dataset.
Comment: Quality ControlWe do a second quality control similar to the first one to check the quality of the sequences after cleaning them.
Quality Control with Falco and MultiQC
Hands On: Falco
- Falco ( Galaxy version 1.2.4+galaxy0) with the following parameters:
- param-collection “Raw read data from your current history”: output from tool Cutadapt
- MultiQC ( Galaxy version 1.11+galaxy1) with the following parameters:
- In “Results”:
- “Which tool was used generate logs?”:
FastQC(no matter whether FastQC or Falco was used)- param-repeat “Insert FastQC output”
- param-collection “FastQC output”: the
rawoutput from tool FalcoComment: CommentYou should notice an improvement on the quality of your sequences.
Filtering the collection
Hands On: Filter empty datasets
- Filter empty datasets with the following parameters
- param-collection “Input Collection”: output collection from Cutadapt step
- FASTQ Groomer ( Galaxy version 1.1.5+galaxy2) with the following parameters:
- param-collection “File to groom” : output collection from the tool Filter empty datasets
This step is notably there to produce “standardized” fastqsanger sequences files so we can then use other tools accepting only such data format.
- Filter FASTQ ( Galaxy version 1.1.5) with the following parameters:
- “FASTQ File”: output collecton from tool FastQ Groomer
- “Minimum size”:
300Comment: CommentHere we descide to only keep sequences of 300bp or above, you may change this parameter depending on your dataset
Changing files names
Hands On: Extract element identifiers and remove extensions
- Extract element identifiers ( Galaxy version 0.0.2)
- param-collection “Dataset collection”: output from the previous step
- Regex Find And Replace ( Galaxy version 1.0.3) with the following parameters:
- “Select lines from”: output of the previous step
- In “Check”:
- param-repeat “Insert Check”
- “Find Regex”:
.ab1- “Replacement”: ``
Comment: CommentThis is to ensure that all your files names end with .fastq.gz
- Paste with the following parameters:
- param-file “Paste”: the file from tool Extract element identifiers
- param-file “and”: the file from tool Regex Find And Replace
- param-select “Delimited by”: Tab
- Check the datatype
- should be ‘tabular’. If not, change it now.
- Click on the galaxy-pencil pencil icon for the dataset to edit its attributes
- In the central panel, click galaxy-chart-select-data Datatypes tab on the top
- In the galaxy-chart-select-data Assign Datatype, select your desired datatype from “New Type” dropdown
- Tip: you can start typing the datatype into the field to filter the dropdown menu
- Click the Save button
Hands On: Relabel identifiers
- Relabel identifiers with the following parameters:
- param-collection “Input Collection”: output from tool Filter FastQ
- “How should the new labels be specified?”:
Map original identifiers to new ones using a two column table.
Alignments on NCBI database
Hands On: NCBI BLAST alignment
- FASTQ to FASTA ( Galaxy version 1.1.5) with the following parameters:
- param-collection “Input FASTQ File”: output collection from tool Relabel Identifiers
- NCBI BLAST+ blastn ( Galaxy version 2.14.1+galaxy2) with the following parameters:
- param-collection Nucleotide query sequence(s): output from the previous step
- “Subject database/sequences”:
Locally installed BLAST database
- “Nucleotide BLAST database”:
NCBI NT (01 Sep 2023)- “Output format”:
Tabular (extended 25 columns)- “Advanced Options”:
Hide Advanced Options
Hands On: Extracting best hits
- Unique ( Galaxy version 0.3) with the following parameters:
- param-collection “File to scan for unique values”: output from the previous step
- “Advanced Options”:
Show Advanced Options
- “Column start”:
c1- “Column end”:
c1
Workflow Outputs
-
Collection of raw FASTQ files: Input AB1 files converted into FASTQ files.
-
Collection of FASTQ files (after quality control): Renamed Fastq files ready for submission after quality control and filtering.
-
Collection of FASTA files: FASTQ files converted into FASTA format. Used for conducting BLAST alignments.
-
Falco Quality Control Results before and after cleaning: Both raw Falco results and HTML reports are created
-
MultiQC Quality Control Results before and after cleaning: Both raw MultiQC statistics and HTML report are created
-
Raw Blast Results: Results of BLAST alignments conducted on our sequences. Columns names are:
Column NCBI name Description 1 qaccver Query accession dot version 2 saccver Subject accession dot version (database hit) 3 pident Percentage of identical matches 4 length Alignment length 5 mismatch Number of mismatches 6 gapopen Number of gap openings 7 qstart Start of alignment in query 8 qend End of alignment in query 9 sstart Start of alignment in subject (database hit) 10 send End of alignment in subject (database hit) 11 evalue Expectation value (E-value) 12 bitscore Bit score 13 sallseqid All subject Seq-id(s), separated by a ‘;’ 14 score Raw score 15 nident Number of identical matches 16 positive Number of positive-scoring matches 17 gaps Total number of gaps 18 ppos Percentage of positive-scoring matches 19 qframe Query frame 20 sframe Subject frame 21 qseq Aligned part of query sequence 22 sseq Aligned part of subject sequence 23 qlen Query sequence length 24 slen Subject sequence length 25 salltitles All subject title(s), separated by a ‘<>’ -
Filtered Blast Results Files containing the closest homologous sequences.
-
Collection of Fastq files Contains filtered sequences.
How to use ENA upload Tool
Adding ENA “Webin” credentials to your Galaxy user information
Comment: Having an ENA Submission AccountMake sure you have a submission account with the European Nucleotide Archive (ENA). You will need the identifier and the password, available through https://www.ebi.ac.uk/ena/submit/webin/login.
Hands On: Add your "WEBIN" credentials to your Galaxy accountInstructions: - From the Menu, click on “User” > “Preferences”. Click on “Manage Information”. Scroll down to “Your ENA Webin account details” and enter your ENA “Webin” identifier and password.
Submitting using a metadata template file
For this tutorial we will use the ENA default sample checklist.
Note: It is crucial to fill in all the fields marked “Mandatory” and ensure that the sequence names match exactly those indicated in the Excel file.
Comment: ENA Metadata TemplatesYou can find metadata templates for each checklist in the ELIXIR-Belgium GitHub repository
Direct download link of the ENA default sample checklist
Direct download link of the ENA default sample checklist filled with elements for the training
You will need to import this file into your Galaxy history. Then, use the ENA Upload Tool to proceed with the submission.
Hands On: Excel Metadata Template
Import the ENA default sample checklist file.
https://github.com/galaxyproject/training-material/raw/24776cf161e38ac0449755749d23e851400020aa/topics/ecology/tutorials/ENA_Biodiv_submission/metadata_GdBqCOI_ERC000011_Test.xlsx
- Copy the link location
Click galaxy-upload Upload at the top of the activity panel
- Select galaxy-wf-edit Paste/Fetch Data
Paste the link(s) into the text field
Press Start
- Close the window
ENA Upload tool ( Galaxy version 1.11+galaxy1) with the following parameters:
- “Action to execute”:
Add new (meta)data- “Select the metadata input method”:
Excel file- “Select the ENA sample checklist”:
ENA default sample checklist (ERC000011)- “Select Excel file based on template”:
metadata_GdBqCOI_ERC000011_Test.xlsx- “Select input data”:
Dataset or dataset collection- “Add .fastq (.gz, .bz2) extension to the Galaxy dataset names to match the ones described in the input tables?”:
YesComment: DatatypeThe ENA upload tool will then automatically compress fastq sequences files into .fastq.gz format before submission
Warning: Danger: Submit to ENA test server!We suggest you first submit to the ENA test server before making a public submission! Submission can be seen in
Dashboard/Study Report
Conclusion
This tutorial guides you through quality check and preparing raw data files for ENA submission. You can then verify that your sequences have been successfully sent by logging into the Test ENA portal (https://wwwdev.ebi.ac.uk/ena/submit/webin/login) and navigating to the Study Report section.


