Conda Environments For Software Development
| Author(s) |
|
| Reviewers |
|
OverviewQuestions:
Objectives:
What are Conda environments in software development and why you should use them?
How can we manage Conda environments and external (third-party) libraries via Conda?
Requirements:
Set up a Conda environment for our software project using
conda.Run our software from the command line.
Time estimation: 30 minutesLevel: Intermediate IntermediateSupporting Materials:Published: Oct 19, 2022Last modification: May 18, 2023License: Tutorial Content is licensed under Creative Commons Attribution 4.0 International License. The GTN Framework is licensed under MITpurl PURL: https://gxy.io/GTN:T00085rating Rating: 5.0 (0 recent ratings, 1 all time)version Revision: 3
Best viewed in a Jupyter NotebookThis tutorial is best viewed in a Jupyter notebook! You can load this notebook one of the following ways
Launching the notebook in Jupyter in Galaxy
- Instructions to Launch JupyterLab
- Open a Terminal in JupyterLab with File -> New -> Terminal
- Run
wget https://training.galaxyproject.org/training-material/topics/data-science/tutorials/python-conda/data-science-python-conda.ipynb- Select the notebook that appears in the list of files on the left.
Downloading the notebook
- Right click one of these links: Jupyter Notebook (With Solutions), Jupyter Notebook (Without Solutions)
- Save Link As..
Conda environments, like Python Virtual Environments allow you to easily manage your installed packages and prevent conflicts between different project’s dependencies. This tutorial follows an identical structure to the virtualenv tutorial, but with conda.
CommentThis tutorial is significantly based on the Carpentries lesson “Intermediate Research Software Development”.
If you have a python project you are using, you will often see something like following two lines somewhere at the top.
from matplotlib import pyplot as plt
import numpy as np
This means that our code requires two external libraries (also called third-party packages or dependencies) -
numpy and matplotlib.
Python applications often use external libraries that don’t come as part of the standard Python distribution. This means that you will have to use a package manager tool to install them on your system.
Applications will also sometimes need a specific version of an external library (e.g. because they require that a particular bug has been fixed in a newer version of the library), or a specific version of Python interpreter. This means that each Python application you work with may require a different setup and a set of dependencies so it is important to be able to keep these configurations separate to avoid confusion between projects. The solution for this problem is to create a self-contained environment per project, which contains a particular version of Python installation plus a number of additional external libraries.
If you see something like
import pysam
You know you’ll need additional packages installed on your system, as it relies on htslib, a C library for working with HTS data. This usually means installing additional packages and things that are not always available from within Python’s packaging ecosystem.
Conda environments go beyond virtual environments, and make it easier to develop, run, test and share code with others. In this tutorial, we learn how to set up an environment to develop our code and manage our external dependencies.
AgendaIn this tutorial, we will cover:
Conda Environments
So what exactly are conda environments, and why use them?
A conda environment is an isolated working copy of specific versions of one of more packages and all of their dependencies.
This is in fact simply a directory with a particular structure which includes links to and enables multiple side-by-side installations of different packages or different versions of the same external library to coexist on your machine and only one to be selected for each of our projects. This allows you to work on a particular project without worrying about affecting other projects on your machine.
As more external libraries are added to your project over time, you can add them to its specific environment and avoid a great deal of confusion by having separate (smaller) environments for each project rather than one huge global environment with potential package version clashes. Another big motivator for using environments is that they make sharing your code with others much easier (as we will see shortly). Here are some typical scenarios where the usage of environments is highly recommended (almost unavoidable):
- You have two dependencies with conflicting dependencies! You cannot install the specific version of software X alongside software Y, as they both depend on different versions of a dependency, that cannot co-exist. This is solved by having different environments for both.
- You have an older project that only works under Python 2. You do not have the time to migrate the project to Python 3 or it may not even be possible as some of the third party dependencies are not available under Python 3. You have to start another project under Python 3. The best way to do this on a single machine is to set up two separate Python environments.
- One of your Python 3 projects is locked to use a particular older version of a third party dependency. You cannot use the latest version of the dependency as it breaks things in your project. In a separate branch of your project, you want to try and fix problems introduced by the new version of the dependency without affecting the working version of your project. You need to set up a separate conda environments for your branch to ‘isolate’ your code while testing the new feature.
You do not have to worry too much about specific versions of external libraries that your project depends on most of the time. Conda environments enable you to always use the latest available version without specifying it explicitly. They also enable you to use a specific older version of a package for your project, should you need to.
Note that you will not have a separate package installations for each of your projects - they will only ever be installed once on your system (in
$CONDA/pkgs) but will be referenced from different environments.
Managing Conda Environments
There are several commonly used command line tools for managing environments:
homebrew, historically used on OSX to manage packages.nix, which has a steep learning curve but allows you to declare the state of your entire systemconda, package and environment management system (also included as part of the Anaconda Python distribution often used by the scientific community)dockerandsingularityare somewhat similar to other environment managers, as they can have isolated images with software and dependencies.- Other, language specific managers
While there are pros and cons for using each of the above, all will do the job of managing environments for you and it may be a matter of personal preference which one you go for. The Galaxy project is heavily invested in the Conda ecosystem and recommends it as an entry point as it is the most generally useful, and convenient. The BioConda ecosystem provides an unbelievably large number of packages for bioinformatics specific purposes, which makes it a good choice in general.
Managing Packages
Part of managing your (virtual) working environment involves installing, updating and removing external packages
on your system. The Conda command (conda) is most commonly used for this - it interacts
and obtains the packages from one or more Conda repositories (e.g. Conda Forge, BioConda, etc.)
Anaconda is an open source Python distribution commonly used for scientific programming - it conveniently installs Python, package and environment management
conda, and a number of commonly used scientific computing packages so you do not have to obtain them separately.condais an independent command line tool (available separately from the Anaconda distribution too) with dual functionality: (1) it is a package manager that helps you find Python packages from remote package repositories and install them on your system, and (2) it is also a virtual environment manager. So, you can usecondafor both tasks instead of usingvenvandpip.
venv and pip are considered the de facto standards for environment and package management for Python 3.
However, the advantages of using Anaconda and conda are that you get (most of the) packages needed for
scientific code development included with the distribution. If you are only collaborating with others who are also using
Anaconda, you may find that conda satisfies all your needs.
It is good, however, to be aware of all these tools (pip, venv, pyenv, etc.),
and use them accordingly. As you become more familiar with them you will realise that equivalent tools work in a similar
way even though the command syntax may be different (and that there are equivalent tools for other programming languages
too to which your knowledge can be ported).
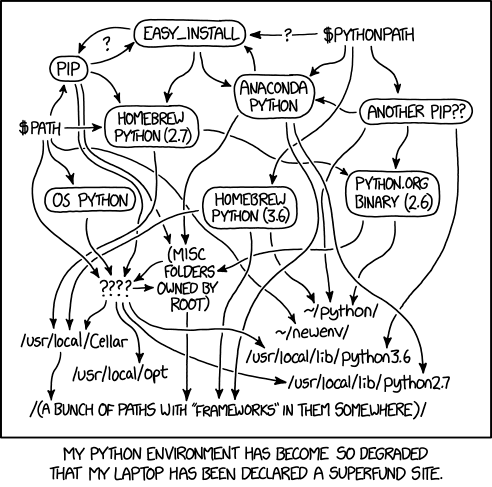 Open image in new tab
Let us have a look at how we can create and manage environments and their packages from the command line using conda.
Instaling Miniconda
We will use Miniconda, a minimal conda installer that is commonly used, in place of the larger and slower to download full anaconda distribution.
Hands On: Installing Conda via Miniconda
- Go to the Miniconda installation page and find the appropriate installer for your system.
- Download and run the script.
- You will probably need to close, and restart your terminal.
- Check that you can run the
condacommand, otherwise something may have gone wrong.
If you’re running on Linux and following this tutorial via a Jupyter/CoCalc notebook, and you agree to the Anaconda terms of service, you can simply run the following cell:
wget -c https://repo.continuum.io/miniconda/Miniconda3-latest-Linux-x86_64.sh
bash Miniconda3-latest-Linux-x86_64.sh -b
Now you can add it to your ~/.bashrc which will cause Conda to be automatically loaded whenever you open a terminal:
~/miniconda3/bin/conda init bash
Here you will need to restart your kernel, or if you’re in a desktop environment, restart your terminal.
Installing our First Package
Let’s install our first package, the new libmamba solver for Conda, as an example of how to install a package. A side benefit is that it will significant speed up your package installations!
conda install -y -q conda-libmamba-solver=22.8
This step we have sometimes seen get “stuck”, it will finish executing the transaction and hang, despite successfully installing the software. You can restart the kernel if this happens.
Here we see a few things:
-y- installs without asking questions like “do you want to do this”. Generally people don’t use this, but in a Notebook environment it’s a bit nicer.-q- quiet installation, by default it prints a lot of progress update messages.conda-libmamba-solver=22.8, the package and version of that package that we wish to install.
We’ll now configure conda to use mamba by default:
conda config --set experimental_solver libmamba
While we’re at it, let’s configure Conda to use the same default repositories as Galaxy:
conda config --add channels bioconda
conda config --add channels conda-forge
This will give us access to the vast repositories of BioConda (bioinformatics software) and Conda Forge (languages and libraries).
Creating a new Environment
Creating a new environment is done by executing the following command:
conda create -y -n my-env
where my-env is any arbitrary name for this Conda environment. Environment names are global, so pick something meaningful when you create one!
For our project, let’s create an environment called hts
conda create -y -n hts
You can list all of the created environments with
conda env list
You’ll notice that there is a base environment created by default, where you can install packages and play around with Conda. We do not recommend installing things into the base environment, if at all possible. Create a new environment for each tool you need to install
Conda’s package resolution takes into account every other package installed in an environment. Especially if you use R packages, this can result in environments taking an inreasing amount to time to install new packages and resolve all of the dependencies.
Thus by using isolated environments, you can be sure package resolution is quite fast.
Once you’ve created an environment, you will need to activate it:
conda activate hts
Activating the environment will change your command line’s prompt to show what environment you are currently using (indicated by its name in round brackets at the start of the prompt), and modify the environment so that any packages you install will be available on the CLI.
When you’re done working on your project, you can exit the environment with:
conda deactivate
If you’ve just done the deactivate, ensure you reactivate the environment ready for the next part:
conda activate hts
Installing External Libraries in an Environment
We noticed earlier that our code depends on two external libraries - numpy and matplotlib as well as pysam which depends on htslib. In order for the code to run on your machine, you need to
install these dependencies into your environment.
To install the latest version of a package with conda you use conda’s install command and specify the package’s name, e.g.:
conda install -y -q python=3 numpy matplotlib pysam
Note that we needed to pick a version of python that we’d use, here we specify python=3 meaning “any Python version that starts with 3”, so it won’t use Python 2.7 or a future Python 4.
If you run the conda install command on a package that is already installed, conda will notice this and do nothing.
To install a specific version of a package give the package name followed by = and the version number, e.g.
conda install numpy=1.21.1.
To specify a minimum version of a Python package, you can
do pip3 install 'numpy>=1.20'.
To upgrade a package to the latest version, e.g. conda update numpy. (If it’s at the latest version it will attempt to downgrade the package)
To display information about the current environment:
conda info
To display information about a particular package installed in your current environment:
conda list python
To list all packages installed with pip (in your current environment):
conda list
To uninstall a package installed in the environment do: conda remove package-name.
You can also supply a list of packages to uninstall at the same time.
Exporting/Importing an Environment with conda
You are collaborating on a project with a team so, naturally, you will want to share your environment with your
collaborators so they can easily ‘clone’ your software project with all of its dependencies and everyone
can replicate equivalent environments on their machines. conda has a handy way of exporting,
saving and sharing environments.
To export your active environment - use conda env export command to
produce a list of packages installed in the environment.
A common convention is to put this list in a environment.yml file:
conda env export > environment.yml
cat environment.yml
The first of the above commands will create a environment.yml file in your current directory.
The environment.yml file can then be committed to a version control system and
get shipped as part of your software and shared with collaborators and/or users. They can then replicate your environment and
install all the necessary packages from the project root as follows:
conda env create -y -f environment.yml
The name is bundled directly into the environment, someone else re-creating
this environment from the yaml file will also be able to conda activate hts
afterwards. If you want it under a different name, you can use the -n flag to
supply your own name.
As your project grows - you may need to update your environment for a variety of reasons. For example, one of your project’s dependencies has
just released a new version (dependency version number update), you need an additional package for data analysis
(adding a new dependency) or you have found a better package and no longer need the older package (adding a new and
removing an old dependency). What you need to do in this case (apart from installing the new and removing the
packages that are no longer needed from your environment) is update the contents of the environment.yml file
accordingly by re-issuing conda env export command and propagate the updated environment.yml file to your collaborators
via your code sharing platform (e.g. GitHub).
For a full list of options and commands, consult the official
condadocumentation
You've Finished the Tutorial
Key points
Environments keep Python versions and dependencies required by different projects separate.
An environment is itself a directory structure of software and libraries
Use
conda create -n <name>to create and manage environments.Use
conda installto install and manage additional external (third-party) libraries.Conda allows you to declare all dependencies for a project in a separate file (by convention called
environment.yml) which can be shared with collaborators/users and used to replicate an environment.Use
conda env export > environment.ymlto take snapshot of your project’s dependencies.Use
conda env create -f environment.ymlto replicate someone else’s environment on your machine from theenvironment.ymlfile.
Frequently Asked Questions
Have questions about this tutorial? Have a look at the available FAQ pages and support channelsFeedback
Did you use this material as an instructor? Feel free to give us feedback on how it went.
Did you use this material as a learner or student? Click the form below to leave feedback.

Citing this Tutorial
- carpentries, Helena Rasche, Conda Environments For Software Development (Galaxy Training Materials). https://training.galaxyproject.org/training-material/topics/data-science/tutorials/python-conda/tutorial.html Online; accessed TODAY
- Hiltemann, Saskia, Rasche, Helena et al., 2023 Galaxy Training: A Powerful Framework for Teaching! PLOS Computational Biology 10.1371/journal.pcbi.1010752
- Batut et al., 2018 Community-Driven Data Analysis Training for Biology Cell Systems 10.1016/j.cels.2018.05.012
@misc{data-science-python-conda,
author = "carpentries and Helena Rasche",
	title = "Conda Environments For Software Development (Galaxy Training Materials)",
	year = "",
	month = "",
	day = "",
	url = "\url{https://training.galaxyproject.org/training-material/topics/data-science/tutorials/python-conda/tutorial.html}",
	note = "[Online; accessed TODAY]"
}
@article{Hiltemann_2023,
	doi = {10.1371/journal.pcbi.1010752},
	url = {https://doi.org/10.1371%2Fjournal.pcbi.1010752},
	year = 2023,
	month = {jan},
	publisher = {Public Library of Science ({PLoS})},
	volume = {19},
	number = {1},
	pages = {e1010752},
	author = {Saskia Hiltemann and Helena Rasche and Simon Gladman and Hans-Rudolf Hotz and Delphine Larivi{\`{e}}re and Daniel Blankenberg and Pratik D. Jagtap and Thomas Wollmann and Anthony Bretaudeau and Nadia Gou{\'{e}} and Timothy J. Griffin and Coline Royaux and Yvan Le Bras and Subina Mehta and Anna Syme and Frederik Coppens and Bert Droesbeke and Nicola Soranzo and Wendi Bacon and Fotis Psomopoulos and Crist{\'{o}}bal Gallardo-Alba and John Davis and Melanie Christine Föll and Matthias Fahrner and Maria A. Doyle and Beatriz Serrano-Solano and Anne Claire Fouilloux and Peter van Heusden and Wolfgang Maier and Dave Clements and Florian Heyl and Björn Grüning and B{\'{e}}r{\'{e}}nice Batut and},
	editor = {Francis Ouellette},
	title = {Galaxy Training: A powerful framework for teaching!},
	journal = {PLoS Comput Biol}
}
Funding
These individuals or organisations provided funding support for the development of this resource
Congratulations on successfully completing this tutorial!
Do you want to extend your knowledge?Follow one of our recommended follow-up trainings: